Optimization Part 2
Optimization Part 2
Today we continue learning about the high-performance web, looking at techniques including asset loading, minimizing requests, minification, SSL certificates, HTTP/2, and more. Most importantly, we'll put our first website on the internet!
Today is a bit of a "grab bag" of different techniques, but they all have one thing in common: they make your website faster. This in turn improves your SEO, and, most importantly, your users' experience.
Some of these things can be done while building your site, some of things you have the option to do manually, and some of them are things that you need to 'tweak' on the server that hosts your website.
| Do it on your website | Do manually with a tool | Configure on the server | |
|---|---|---|---|
| Minimize HTTP requests | ✅ | ✅ | ✅ |
| Minification | ✅ | ✅ | ✅ |
| SSL Certificates | ❌ | ✅ | ✅ |
| HTTP/2 | ❌ | ❌ | ✅ |
| Proper URL structure | ✅ | ❌ | ❌ |
| Good URL redirects | ❌ | ✅ | ❌ |

HTTP requests
What is an HTTP request?
HTTP requests are the things your page asks for from the server - your image files, CSS files, and JavaScript files.
Remember in the first week when we talked about the Hypertext Transfer Protocol? "HTTP request" is just a fancy way of saying "file requests that the browser makes to the server".
It's important to minimize HTTP requests (the total number of files requested by the page) because they can slow down your website. It's faster to load one large file that is 100kb than it is to load two smaller files that are 50kb (or even smaller!)
How should I load my assets?
The order in which you load your assets matters.
We put our CSS in the <head> element. The browser reads the CSS before it loads your HTML, so that you can avoid FOUC.
JavaScript files are loaded with the defer attribute so that the user can see the page without waiting for (sometimes quite large) javaScript files to enable custom interactivity.
<script defer src="/scripts/worth-waiting-for.js"></script>There is also a technique for waiting to load your images until you need them. This is called "lazy loading".
Lazy loading is for images that are "below the fold". It means that the image won't get loaded (via an HTTP request) until the user scrolls down to it.
Implementing lazy loading used to be challenging. But now it's very simple! Simply add the loading attribute on your image element, and set the value to lazy!
How to minimize requests
The best way to minimize requests is also the simplest - don't use too many assets!
Using lots of images and JavaScript libraries might seem like a good idea when you're imagining things, but you'll regret it when your website takes forever to load, and slows down the browser to a crawl. Users always pick "works well" over "looks good".
It's always a good idea to only use the assets you need. I'm about to introduce two more ways to minimize requests - inlining and bundling. These two techniques are based on the fact that browser have a limited number of assets they can load simultaneously (between 4 and 8, depending on the browser Opens in a new window).
However, this is no longer true if you're able to enable HTTP/2 on your server (more on that shortly), meaning inlining and bundling aren't necessary for sites served via HTTP/2.
Inlining
Another way to minimize requests is by putting your CSS into a style tag in your header, or putting your JavaScript into a script tag just above closing </body> tag.
While this technique might save you from loading an extra CSS or JavaScript file, you should only do this if your CSS or JavaScript only applies to one page, or if you have a templating system where you can write that CSS or JavaScript once and have it apply to multiple pages. Otherwise, everytime you want to make a change to the code, you have to change it on every page, which is both labour-intensive and error-prone.
Bundling
Finally, there is a technique called "bundling". If you're keeping your CSS or JavaScript in more than one file, you can "bundle" them together into a single file once you're done building your site and you're ready to deploy.

Minification
Empty space can make your files bigger than they need to be! Computers consider spaces, tabs and new lines to be characters, the same as letters, numbers and punctuation.
We tend to write our HTML, CSS and JavaScript with lots of "whitespace" so that they're easy to read.
.this-makes-sense {
    background: green;
    color: red;
    padding: 0 0 1rem 0;
}
.dont-you-think {
    background: red;
    color: green;
    padding: 0 0 1rem 0;
}
However, very little of that whitespace is necessary for a computer to understand our CSS. In this example, if we removed the space between the numbers in the "padding" property, the computer would be unable to figure out what we meant by 001rem0, but all the other whitespace is unnecessary.
The example below is harder on the eyes, but makes exactly as much sense to a computer as the original:
.this-makes-sense{background:green;color:red;padding:0 0 1rem 0}.dont-you-think{background:red;color:green;padding:0 0 1rem 0}Our first example is about 178b in size, while the second example is 126b. That's a 30% savings in file size!
There's a number of ways to minify your assets before you deploy your site. You can use a plugin for your code editor, any of a number of online tools Opens in a new window, or you can make it a part of your build process.

HTTP/2
The Hypertext Transfer Protocol has gotten an upgrade!
And, best thing of all, there's nothing you need to do in your code in order to enable it. It's just a setting on your server. There's only one thing that you need to get in place in order to make sure your site is HTTP/2-ready: you have to have an SSL certificate.
I won't go into the nitty-gritty of HTTP/2, other than to say it's considerably faster, alleviates the need for some optimization techniques (like bundling or inlining), and gives you an advantage over other sites, as less than half Opens in a new window of the top 10 million websites have HTTP/2 enabled.

SSL certificates
Okay, so you need an SSL certificate to enable HTTP/2. But even if you don't have the option to use HTTP/2, you should definitely get an SSL certificate.
What are they?
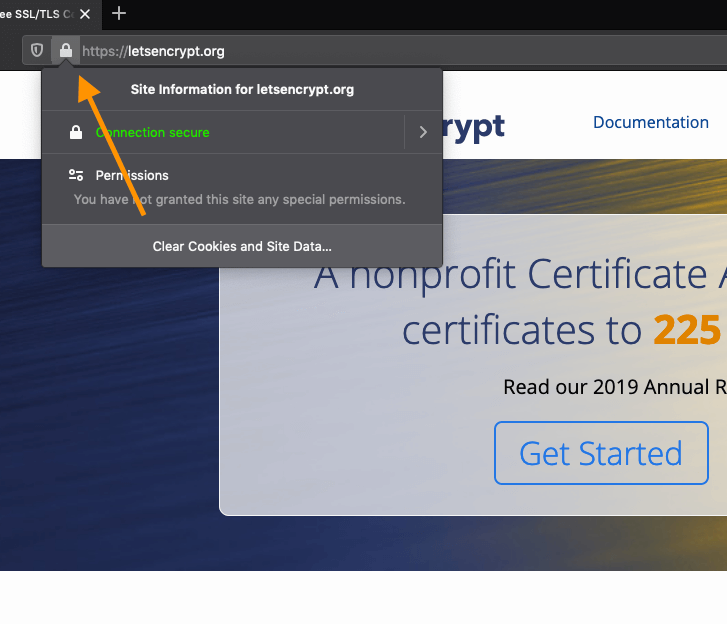
Very simply, an SSL certificate is a small file that lives on your server that proves you are who you say you are. Think of it as your site's id card.
They allow your users' browsers to establish a secure, encrypted connection, meaning they are not vulnerable to a "man-in-the-middle Opens in a new window" attack.
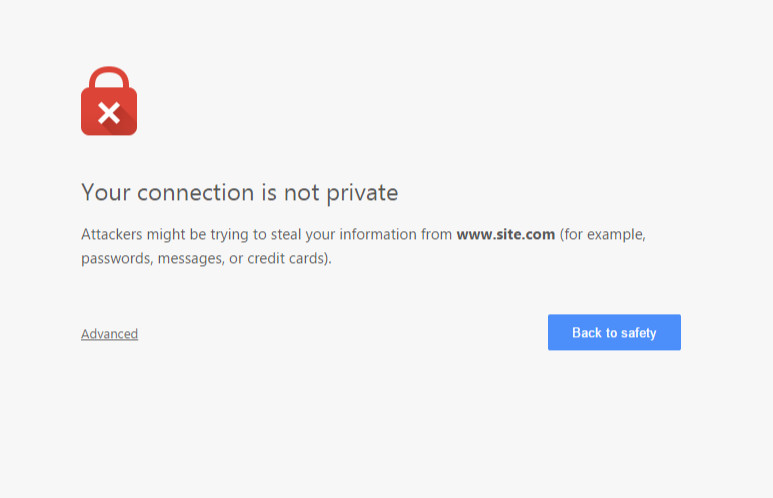
You can easily tell if a website has a valid SSL certificate if you're able to connect to their URL using https:// (rather than http://) at the beginning of the address.
Browsers have lately started warning people if they are visiting a site that makes connections without using https://, not just for the page urls, but also for the urls of images and other assets.
SSL certificates are free, but some hosting packages will charge you a lot of money for them! They can justify this fee because SSL certificates are only valid for 90 days, and it can take some extra work to set up a process that gets a new certificate.
Where do I get one?
Free certificates are available from the non-profit organization Let's Encrypt Opens in a new window.
However, if you use their services directly (as opposed to having it managed by your hosting provider), you still need to go through the process of proving you control the website.
If you're going to choose a hosting provider, check Let's Encrypt list of supporting hosting providers Opens in a new window to see if you can get an SSL certificate through your host.
But you don't need to worry about that today, as we'll have that taken care of for us.

Let's get on the internet!
Today I'll show you the steps to put your own website on the internet.
Lab work
Follow the steps below and send me the URL of your new website!
Note that if any of the screenshots in the steps below are too small, you can click on the image, opening it in a new tab, thus making it easier to zoom in on.
Step 1: Make a website
Remember how we developed the copy deck and image assets for a three-page website? Go ahead and code that now.
Step 2: Put it on Github
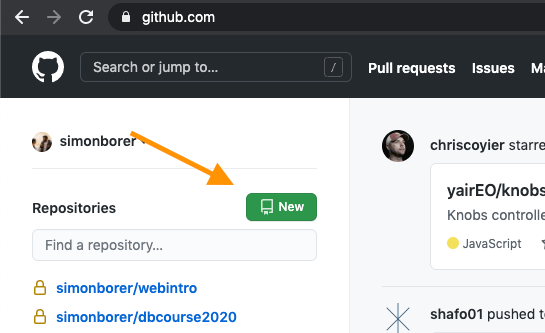
Log in to your github account Opens in a new window.
Create a new repository.
Choose a name for your repo, and then click "Create repository".

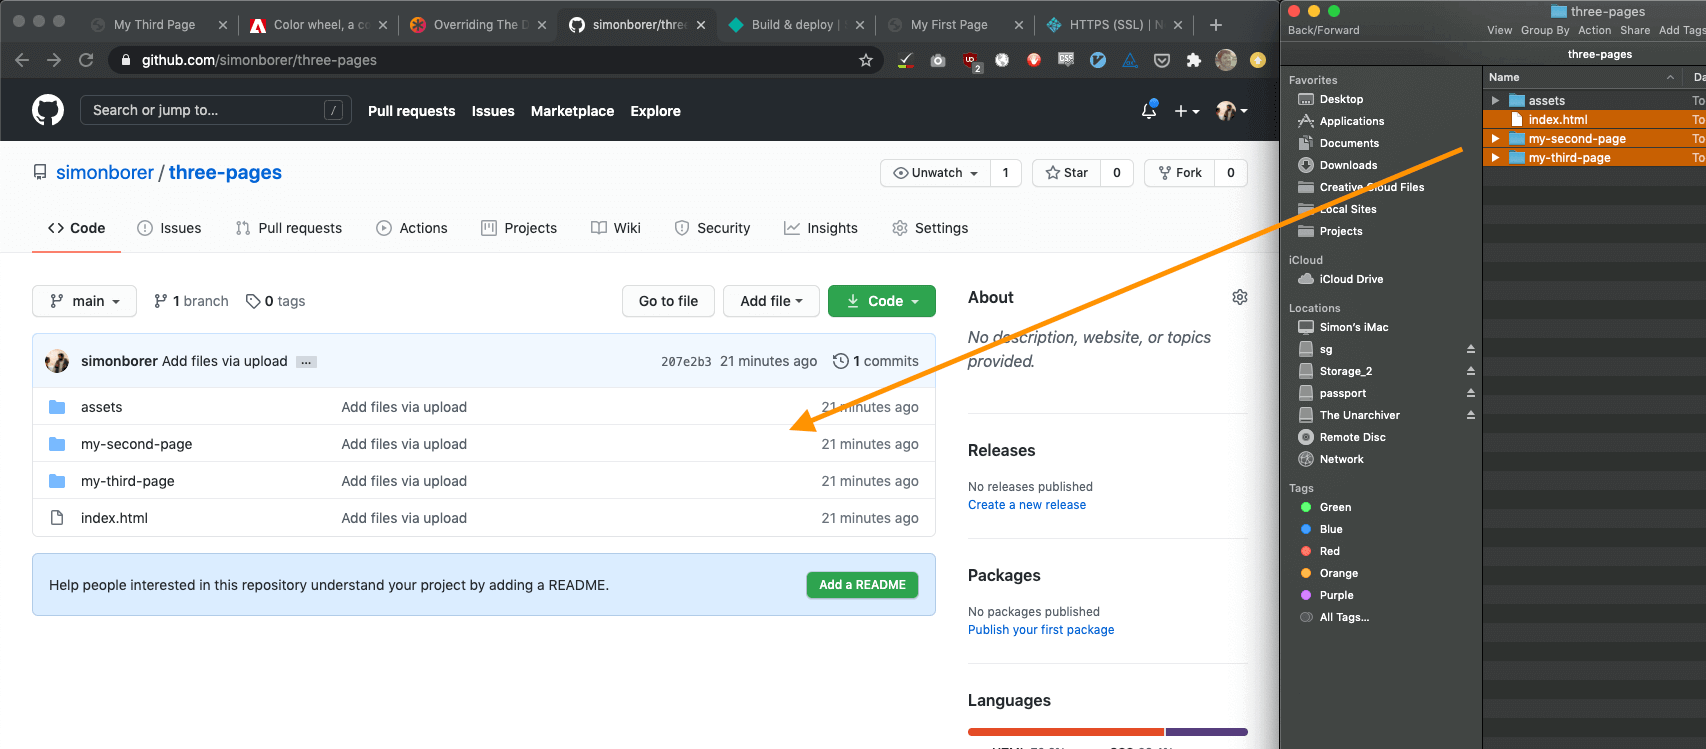
After you create your repository, you'll see a screen like this. Click the link in the text that says, "uploading an existing file".
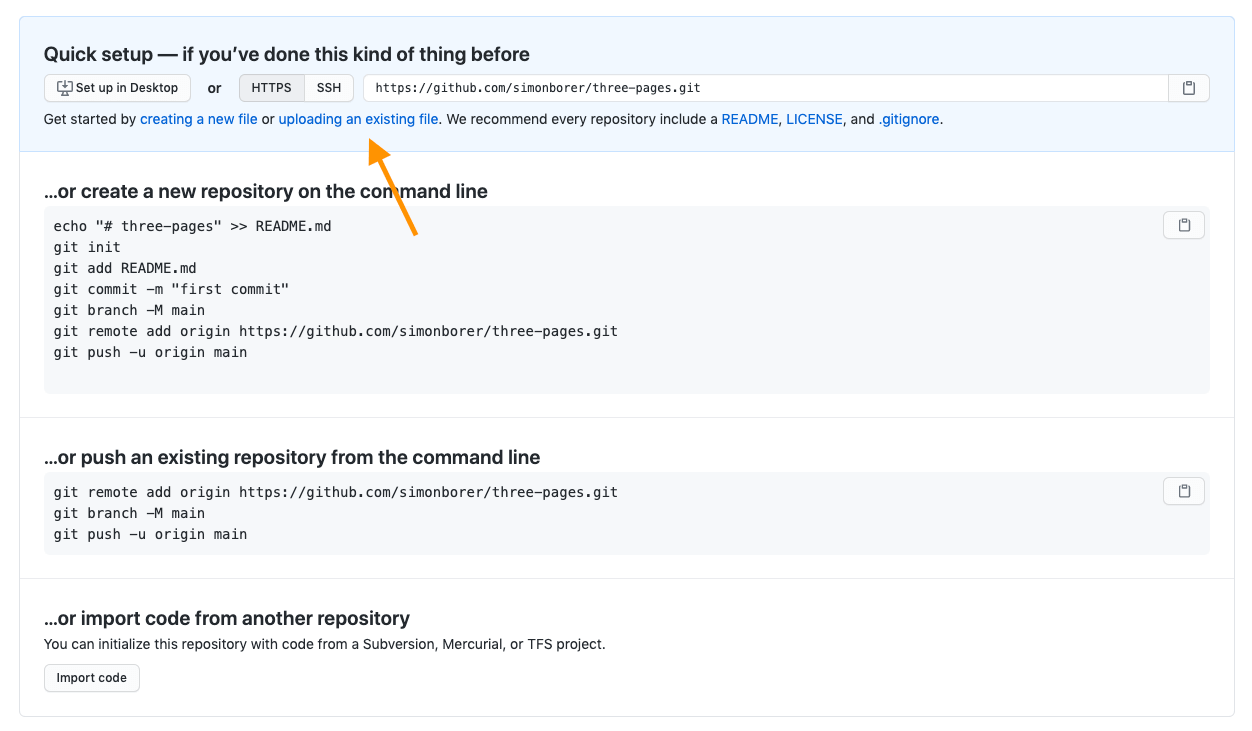
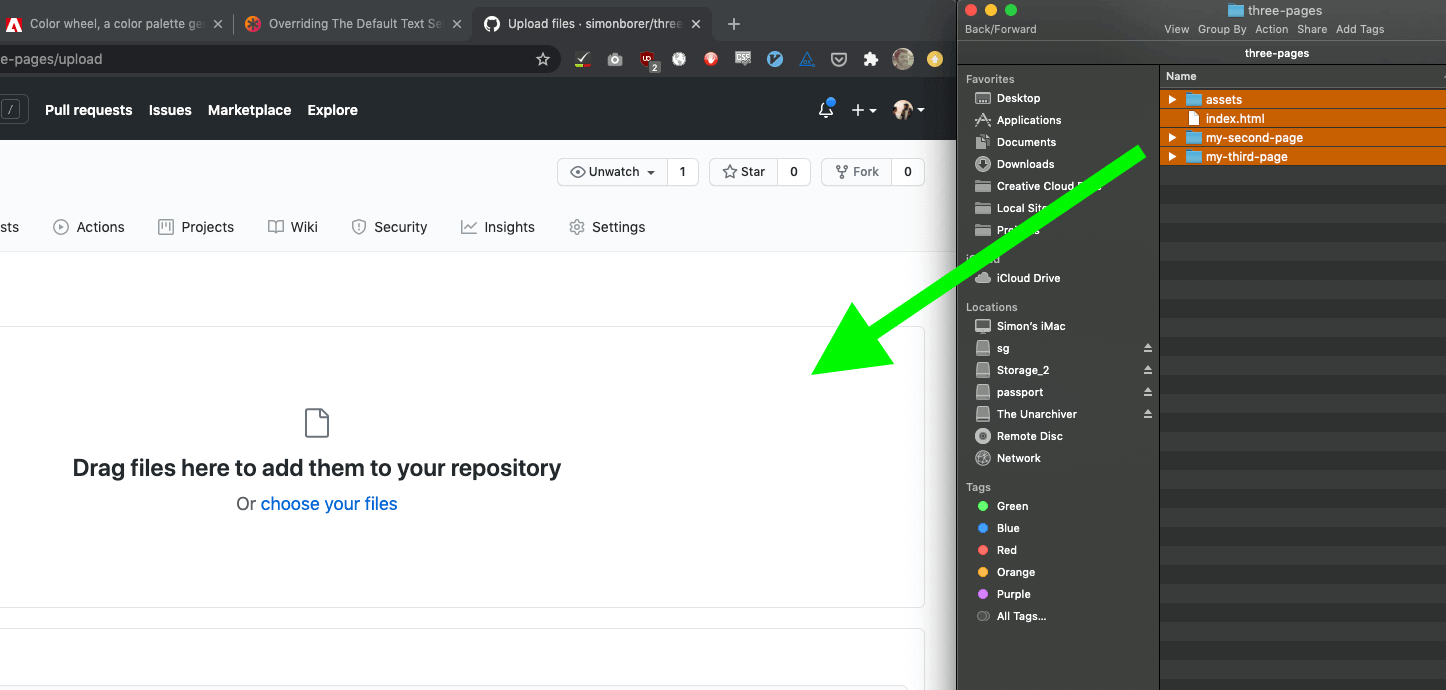
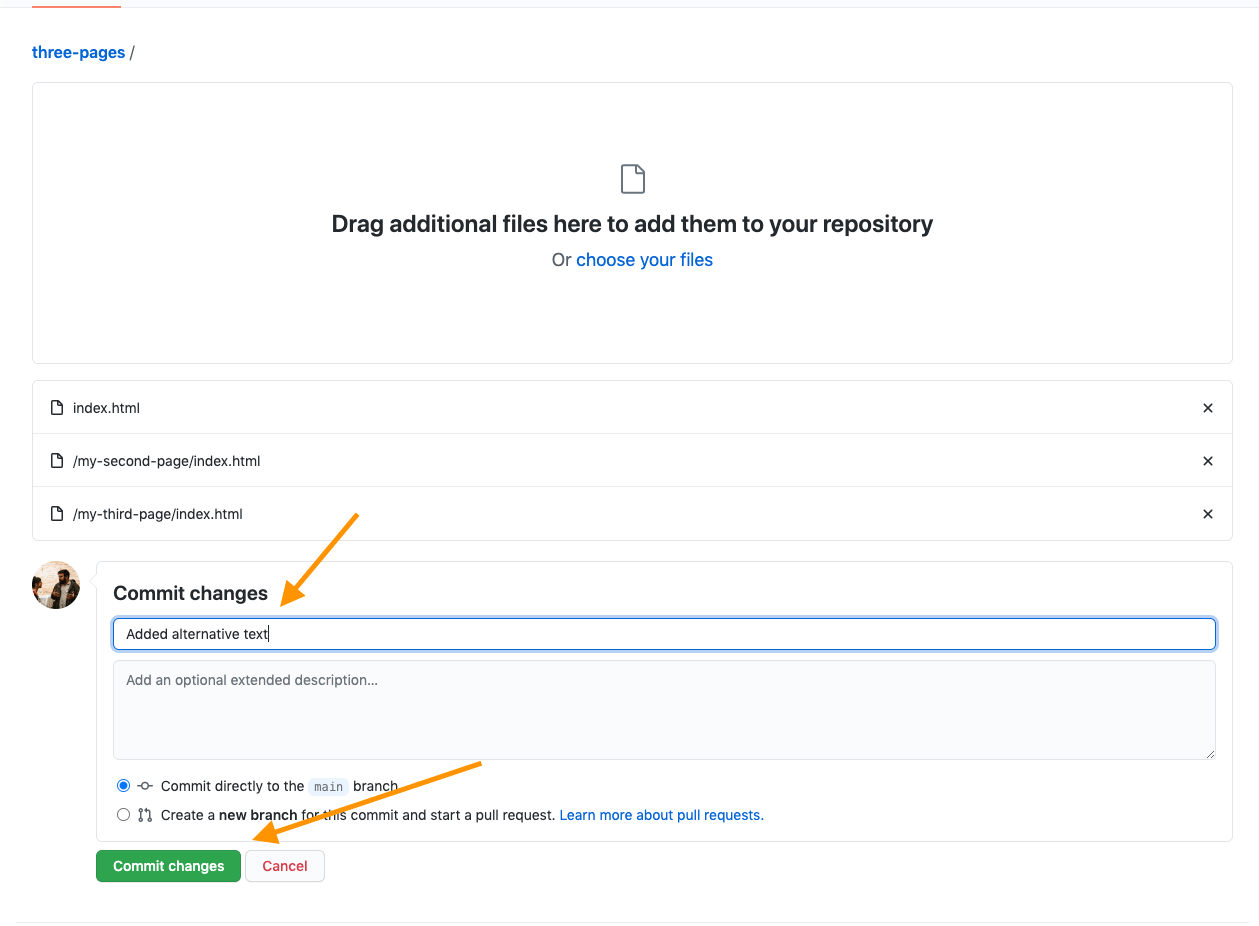
Now you can just "drag and drop" all your website files and folders into Github.
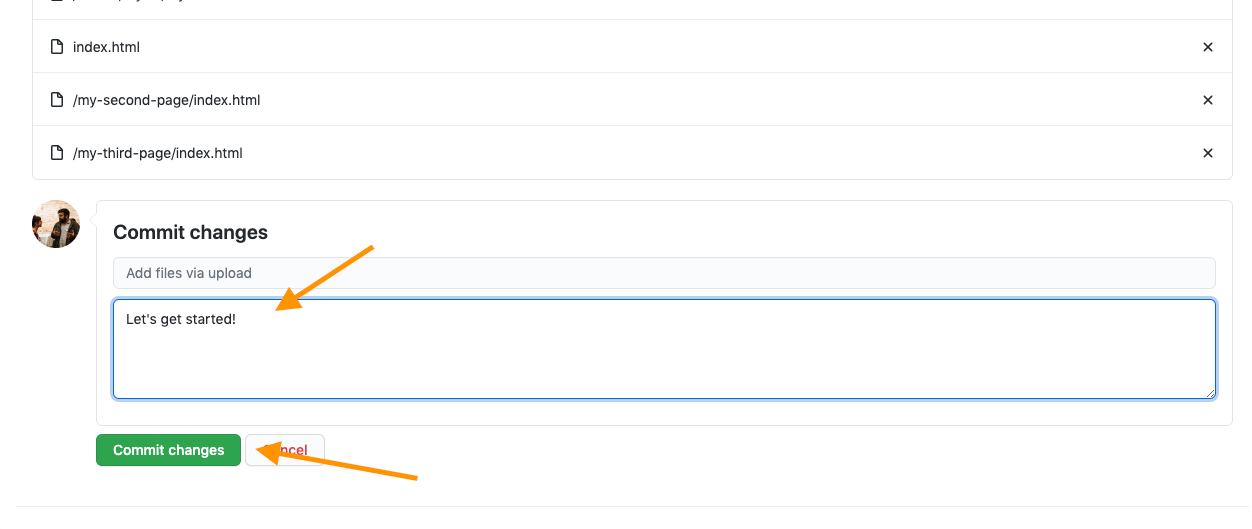
When your files are uploaded, enter a "commit message". You'll want to make a note here every time you change to any of your files, but for the first upload, something like "first upload" is fine.
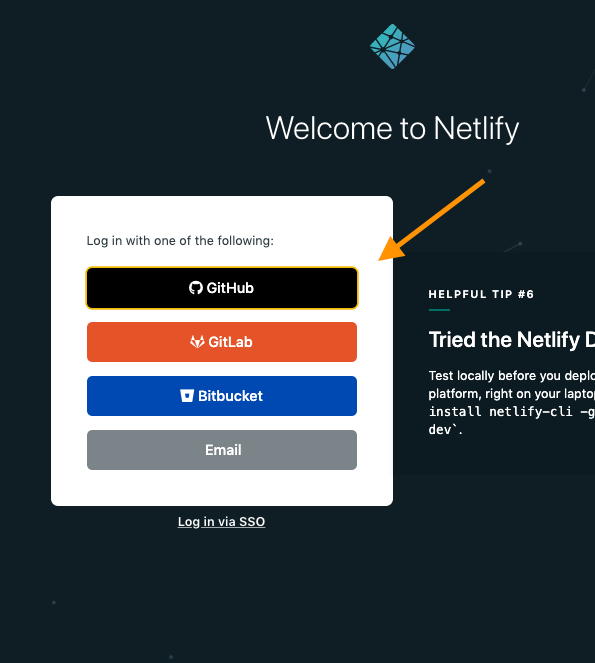
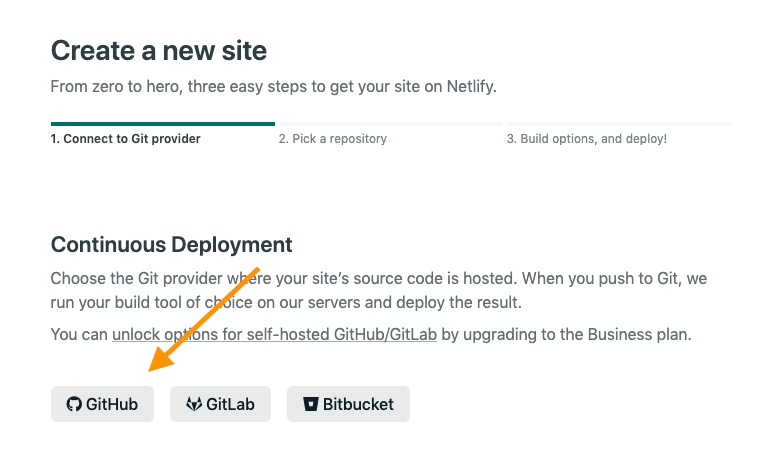
Step 3: Connect it to Netlify
Log in to your Netlify account Opens in a new window using your Github account.
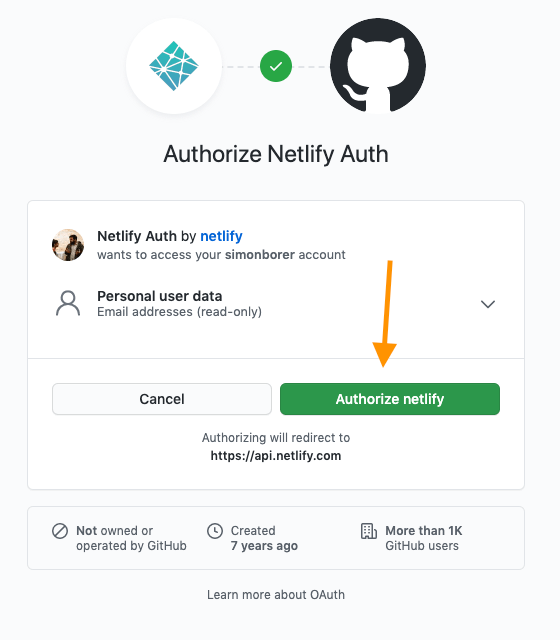
You'll be asked to approve Netlify connecting the two accounts.
To get your site going, start a new site.
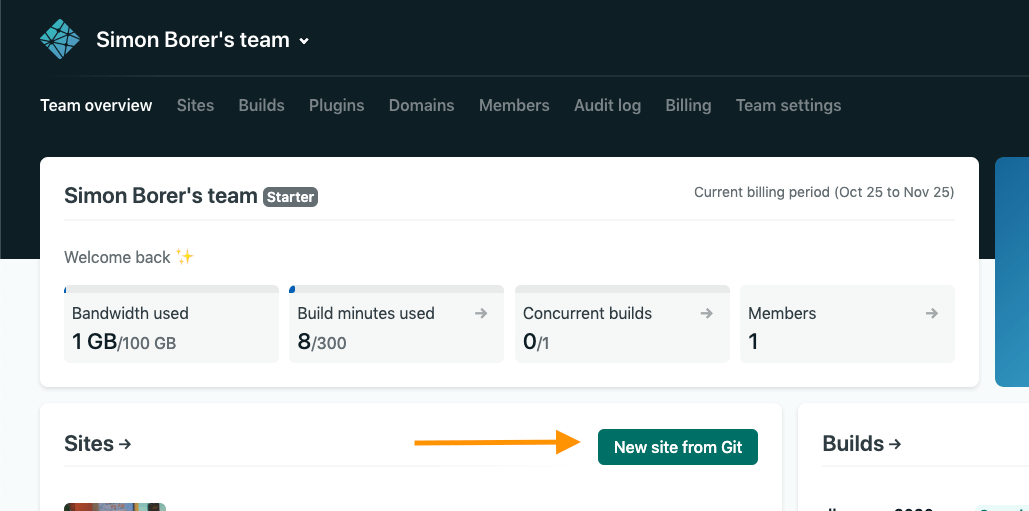
Choose Github as your source
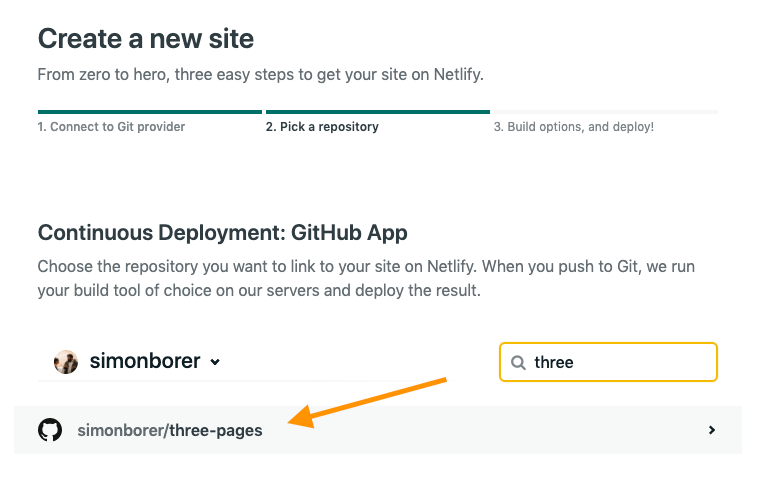
Choose the repo you created
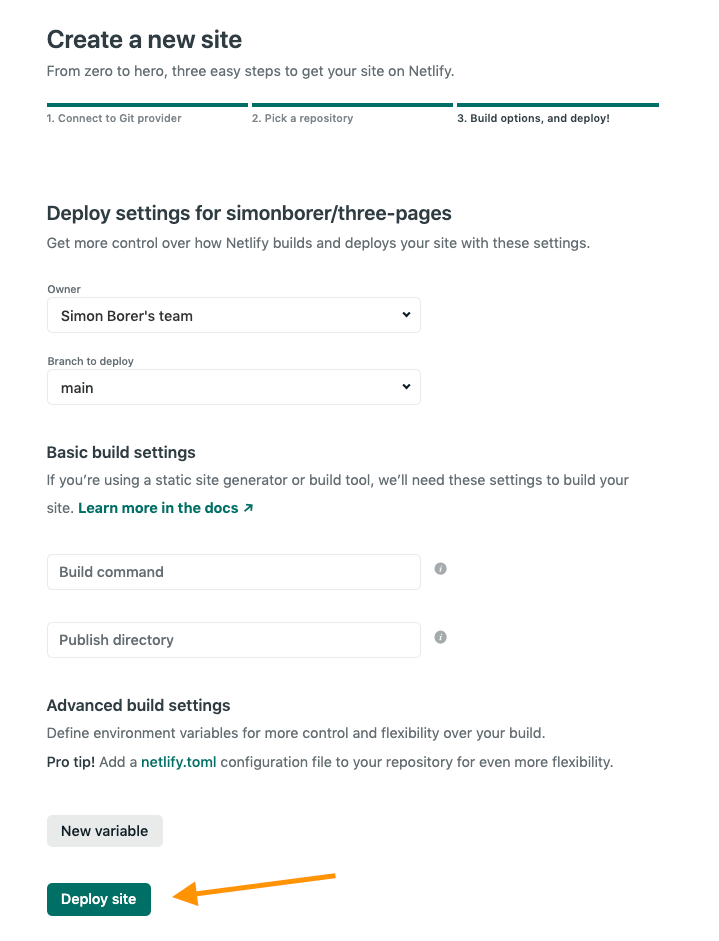
Deploy!
Take a moment to click on your site's ugly new URL and enjoy the power of putting stuff on the internet. When you're ready, come back and let's play with the settings.
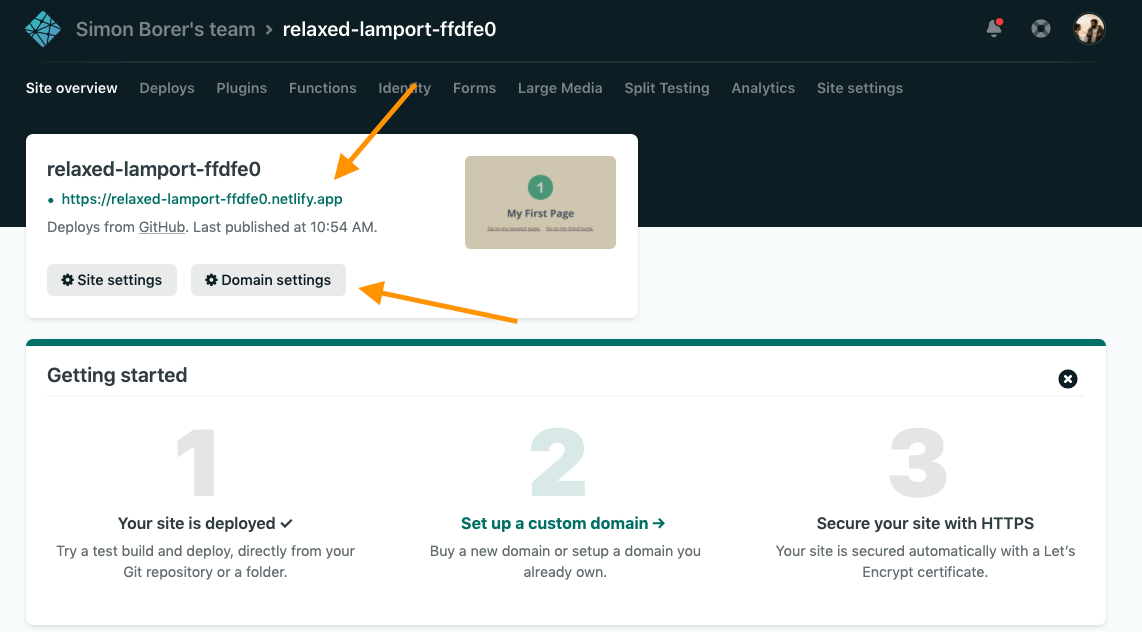
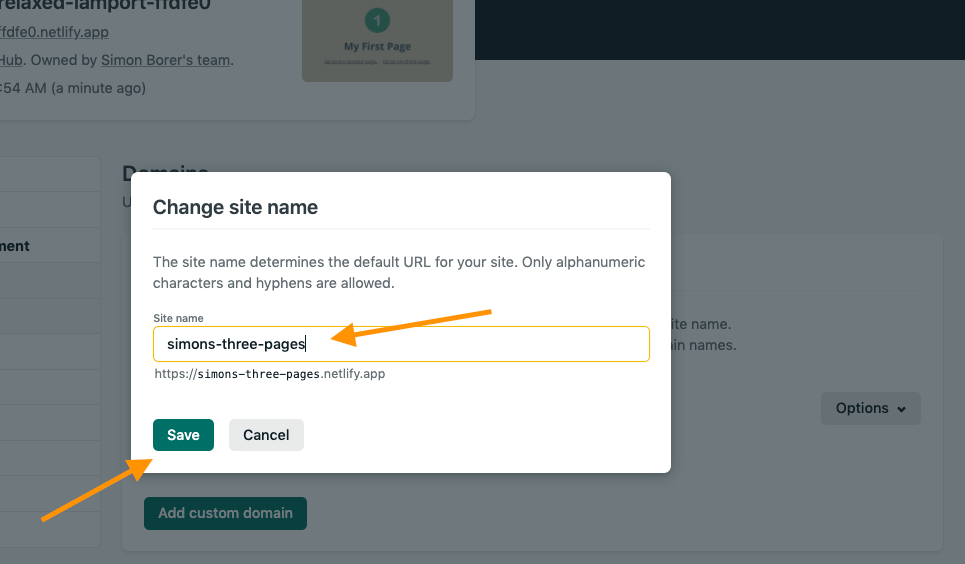
Renaming your site
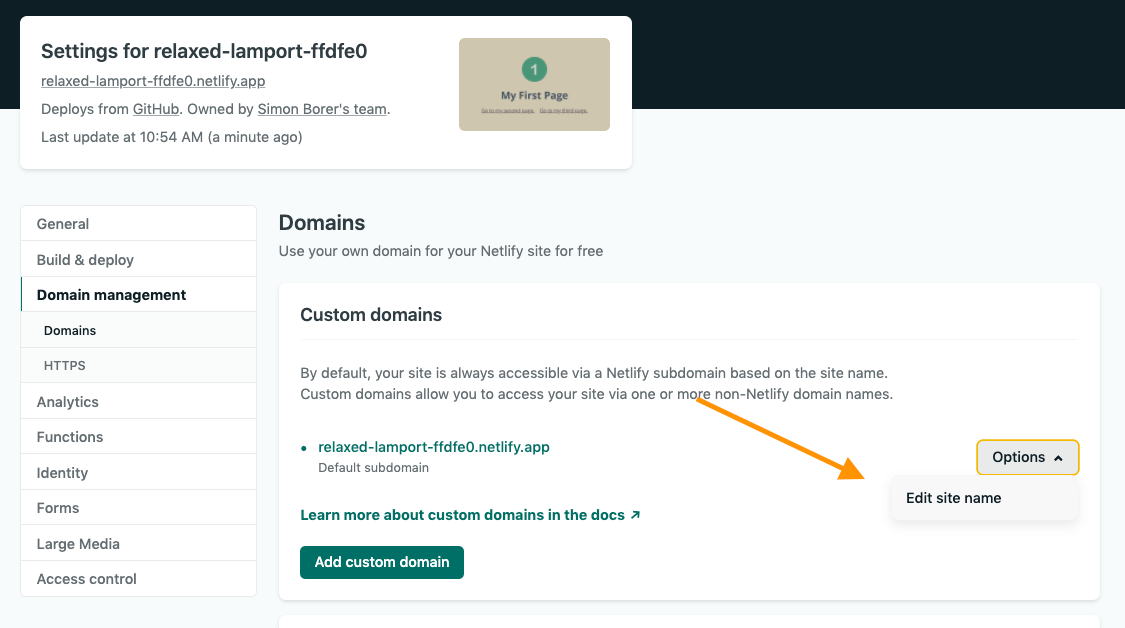
Choosing a name
Optimize!
Optimize...soon
Optimize...now!
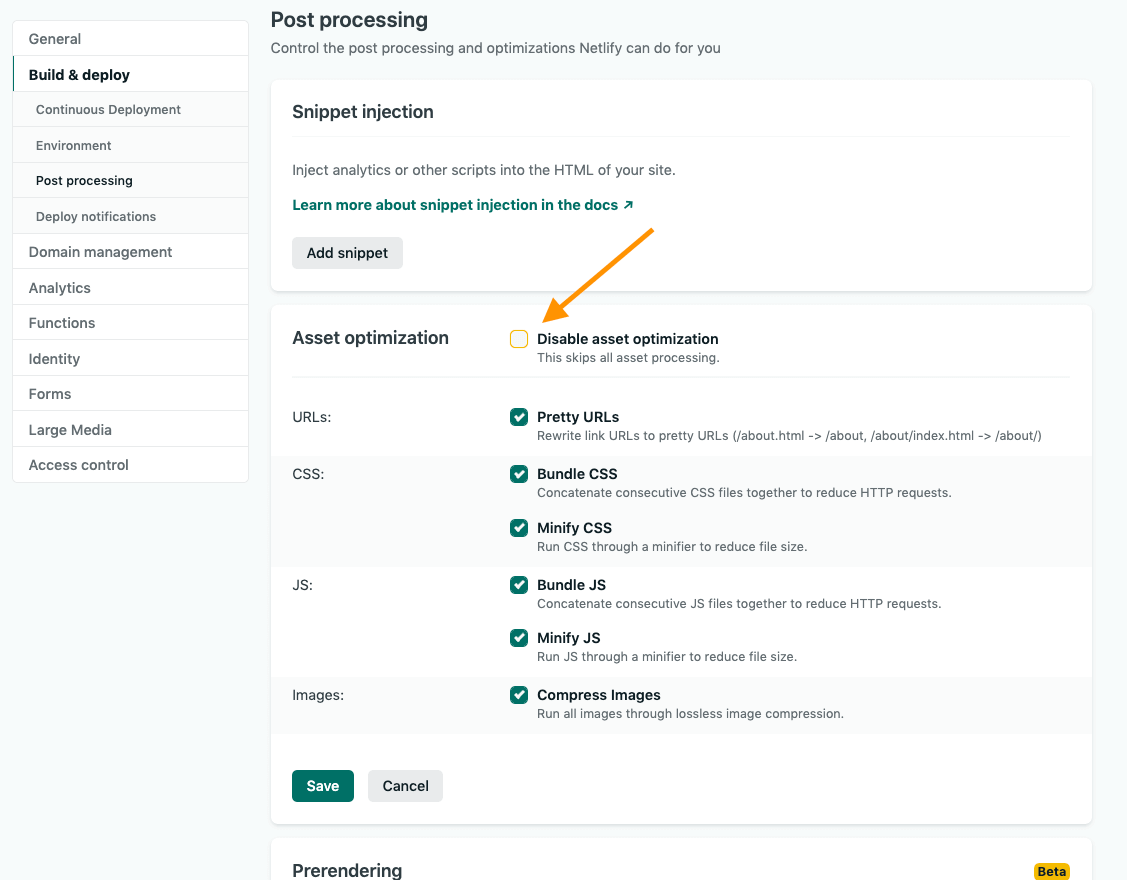
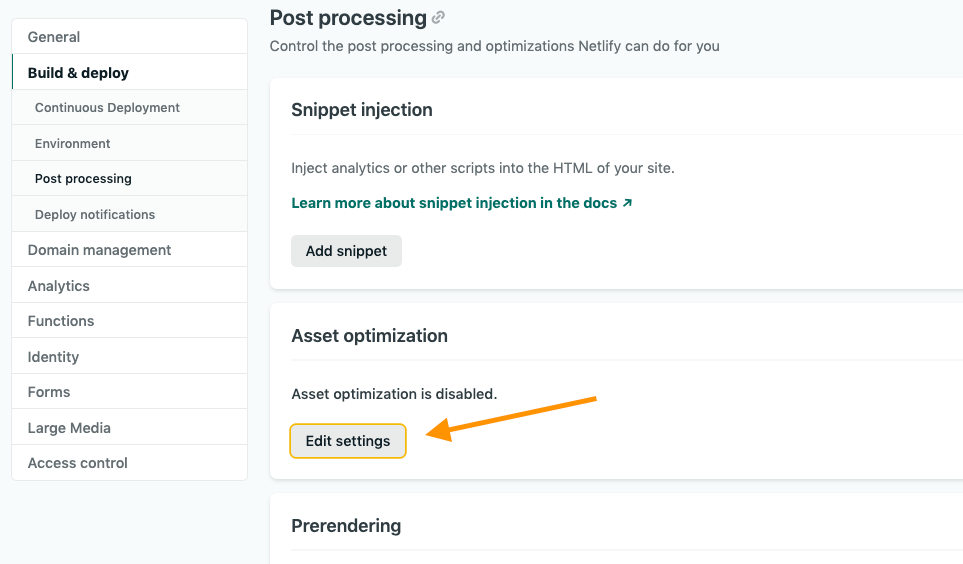
Where's our optimization?
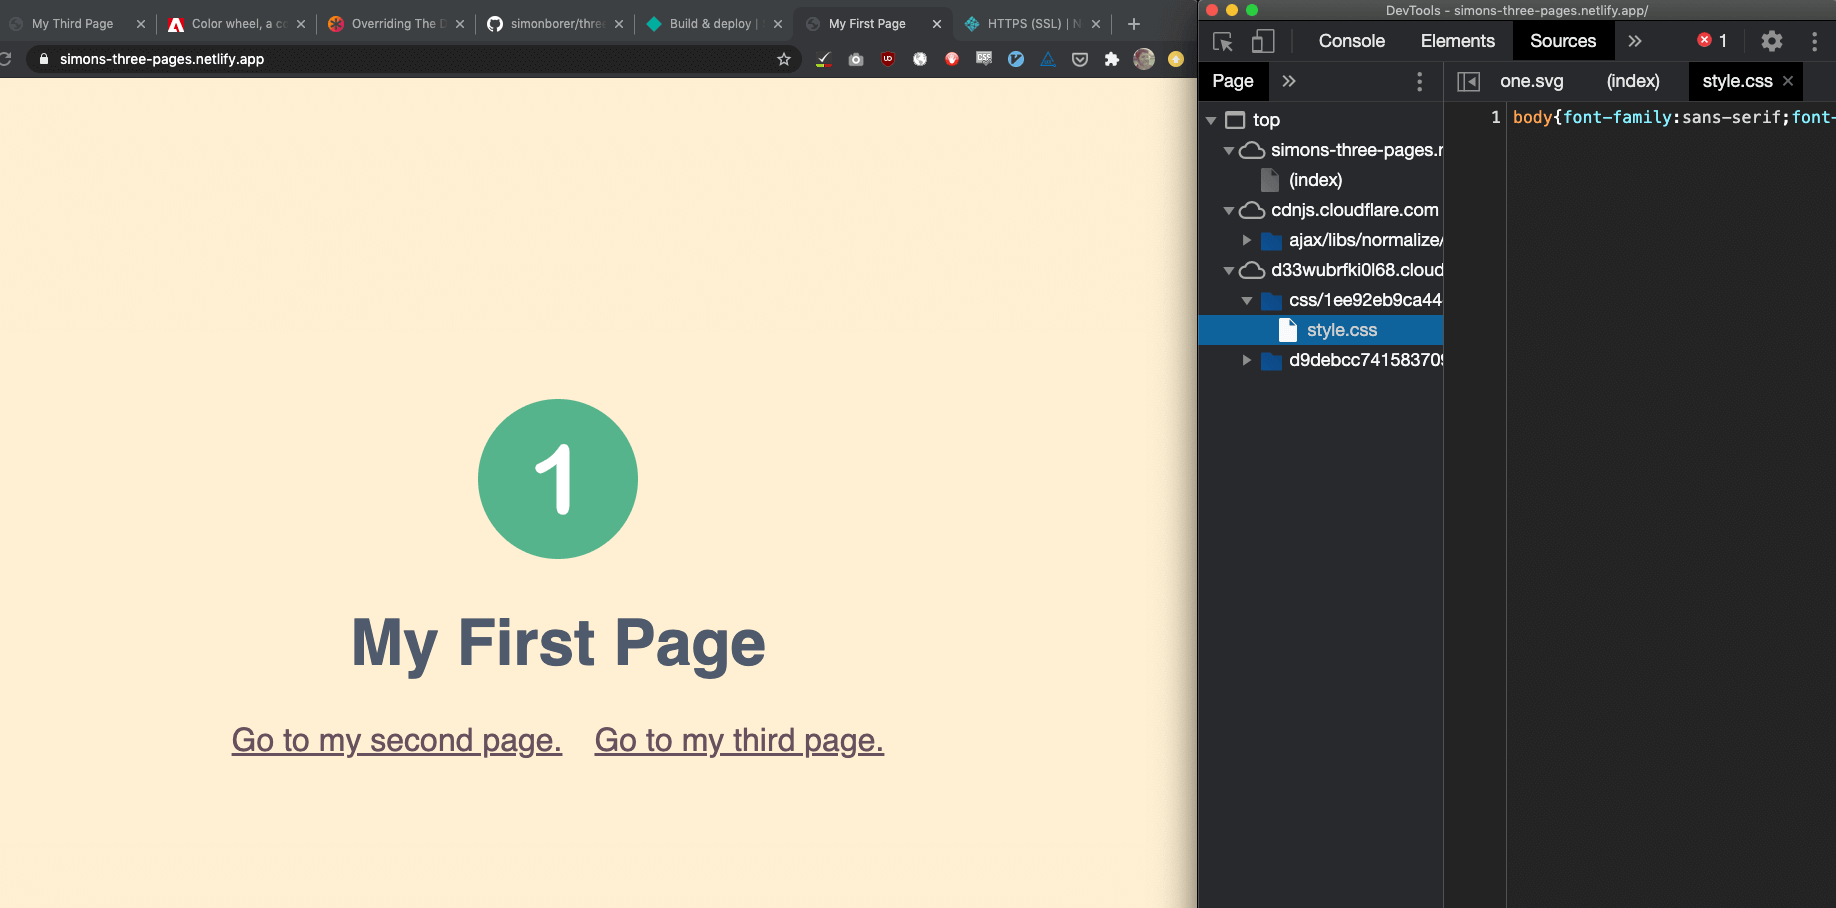
If you go back and check your website, your assets won't be optimized yet. Why is that? Does it take a long time for Netlify to deploy your site?
Nope, Netlify usually deploys within a minute (depending on how complicated your site is). But Netlify will only update your website when you make changes to your code.
So let's make some changes!
Let's change it up.
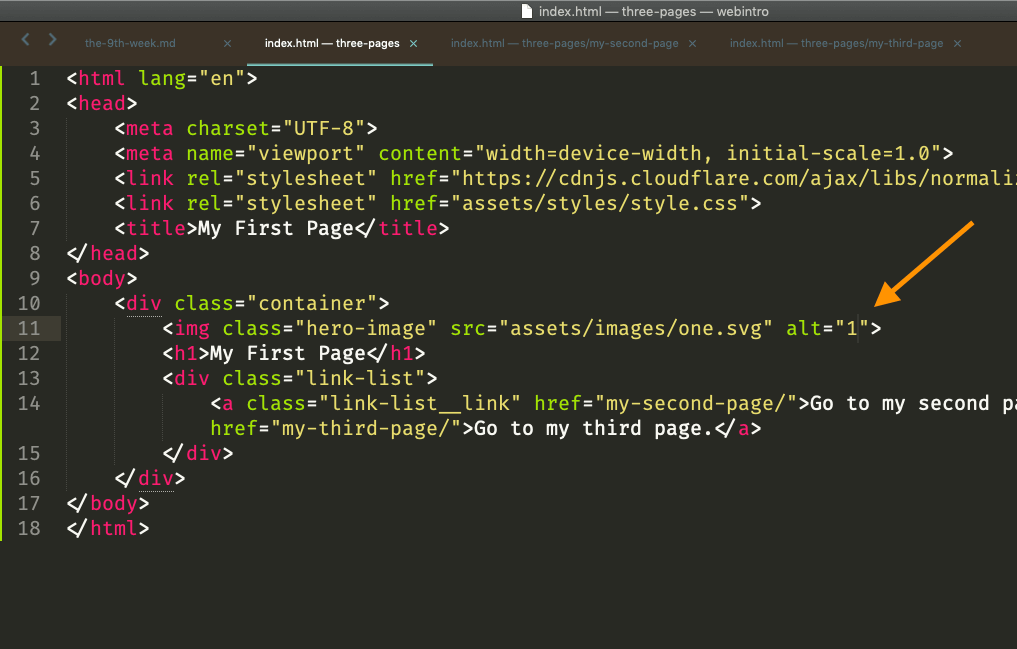
Make a change to your code in your text editor.
Now, go back to your repository in Github, and drag your changed files/folders onto your existing files. You don't have to drag any files that you didn't change (in this case, I didn't make any changes to the "assets" folder).
Make sure you add a message about what you changed, and then click "Commit changes".
Now I can see which files I changed, when I changed them, and why I changed them.

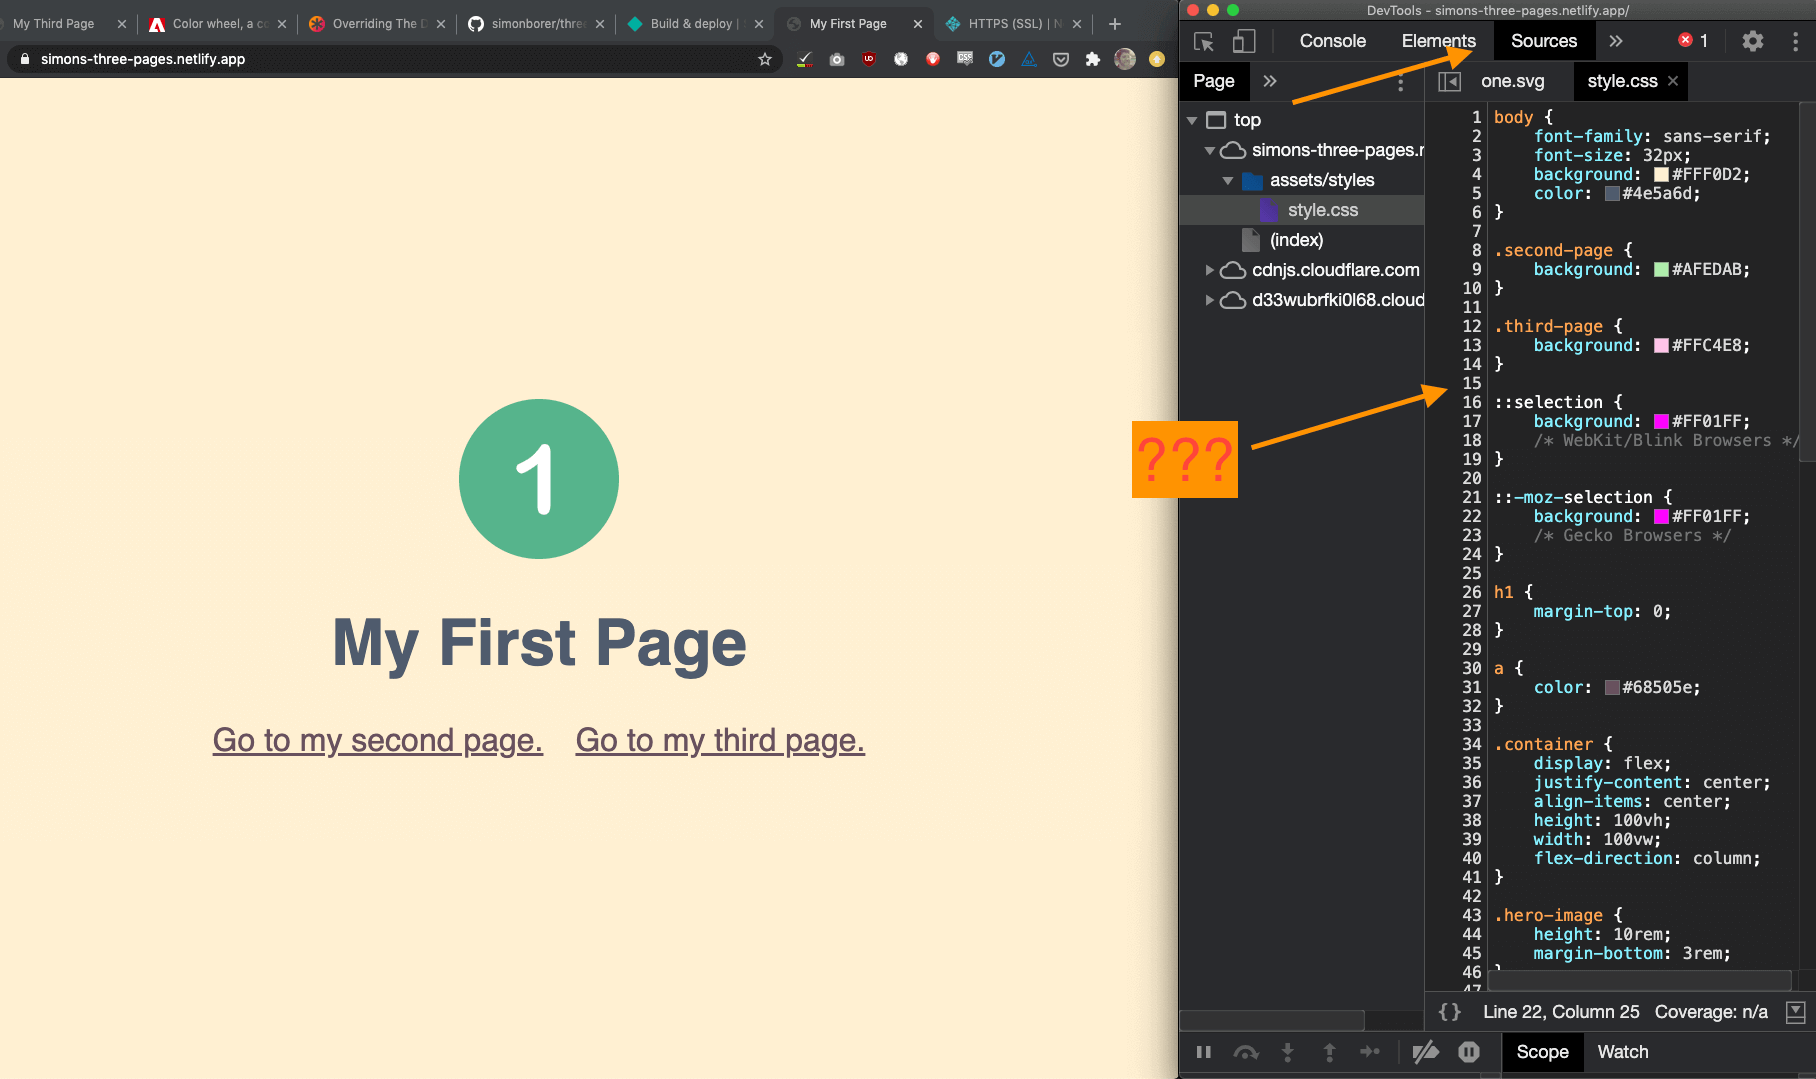
Now if I go back to my website, I can see that my assets are being optimized. Netlify will put a new version of your website onto the internet every time you make a change in your code on Github.
I think that's pretty cool.
Okay, now you!