Wordpress Part 2
Today we learn more about your CMS-driven website, including changing themes, post types, logos, and comment moderation, and then we'll start on our final assignments!
Quick links: Assignment 2 and The Final Assignment
Bonus content!

Post types
Remember last week when I said, "blogs begat Wordpress"? This is important to know, because Wordpress considers every discrete content object you create to be a "post". Pages, blog entries, even documents, images and menu items - as far as Wordpress is concerned, these are all "posts".
Of course, all of these things are used in different ways, and therefore fall into different categories. In Wordpress lingo, these different categories are "post types" (sometimes called "content types" - same thing).
One of the best ways to make Wordpress really dance is to create "custom post types", but that requires learning some PHP, or at least installing a plugin, neither of which are something we're going to do today (or have the option to do with a free Wordpress.com site).
Instead, what we'll do is use a post type that comes with some of the themes on Wordpress.com: the portfolio post type.
The portfolio post type isn't drastically different from the "page" post type. If you know how to make a new page, you know how to make a portfolio post.
The difference, as we'll see, is how Wordpress categorizes these portfolio posts.

Changing your theme
First thing we're going to do today: change our theme to a theme that is compatible with the portfolio post type.
Note the small 2022 update about where to find the "theme" option.
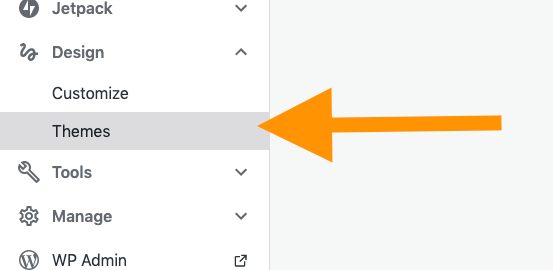
Head to the dashboard of your site, and hover over the "designAppearance" item in the left-hand menu.
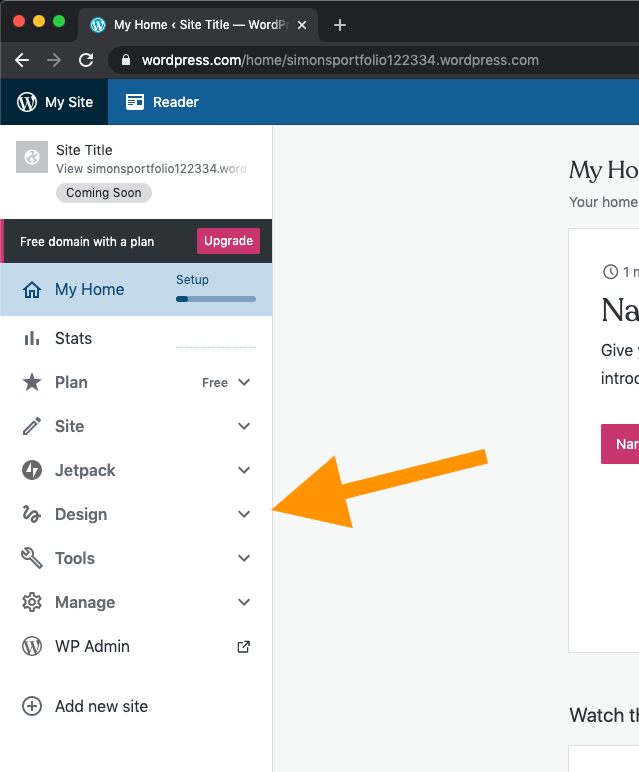
Under "designAppearance", choose "Themes".
You'll see your current theme at the top, with a bunch of thumbnails for "recommended" themes. Scroll past these.
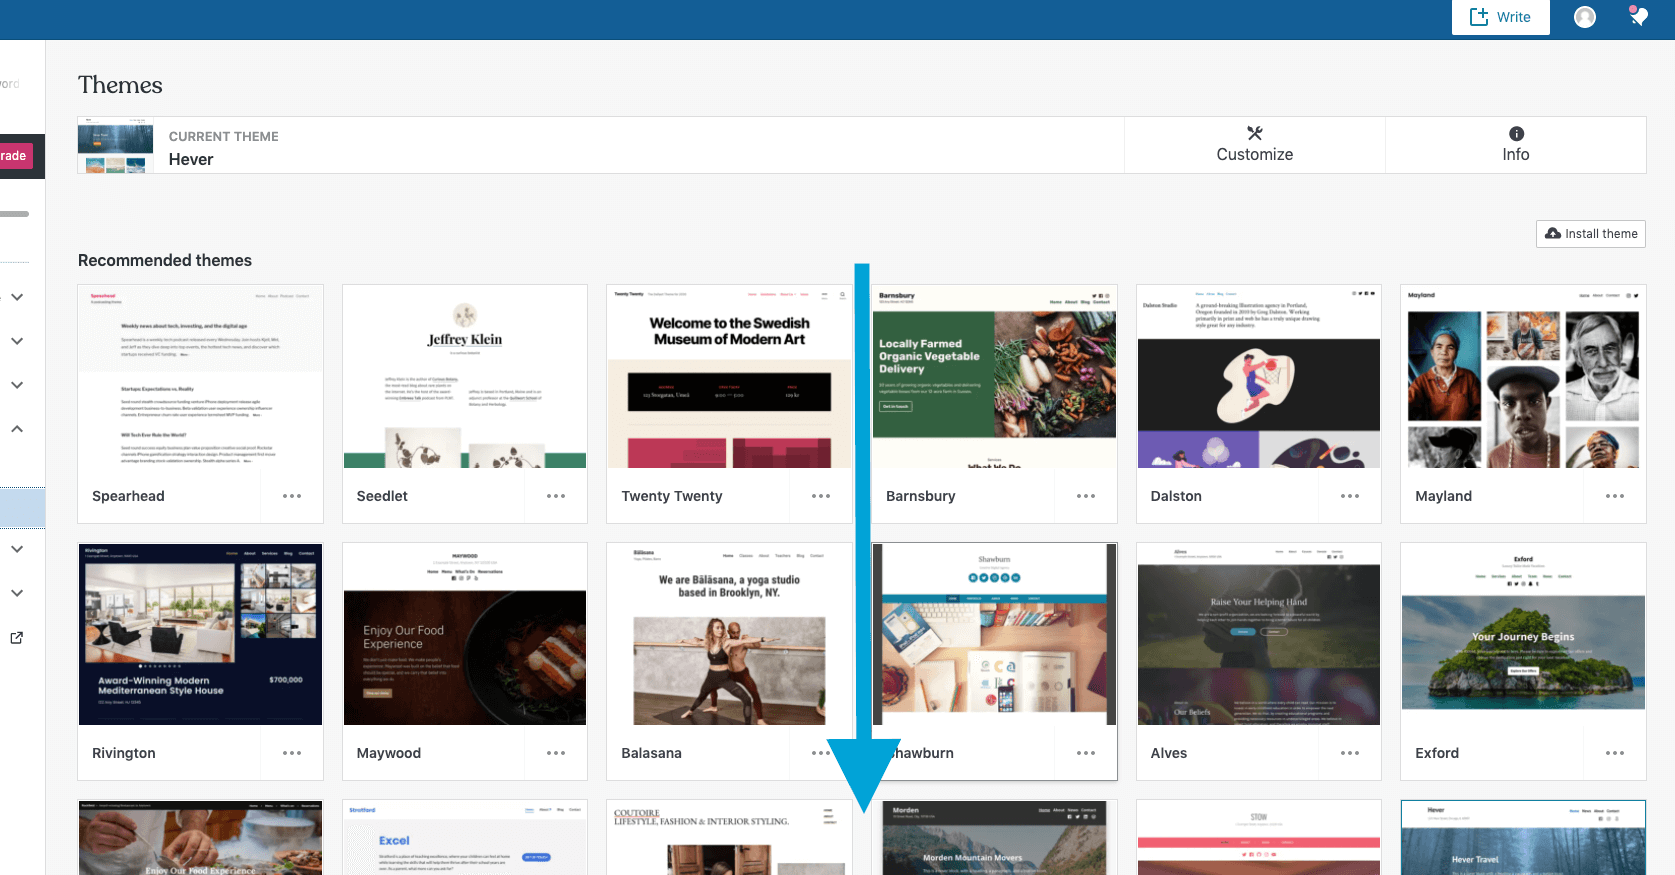
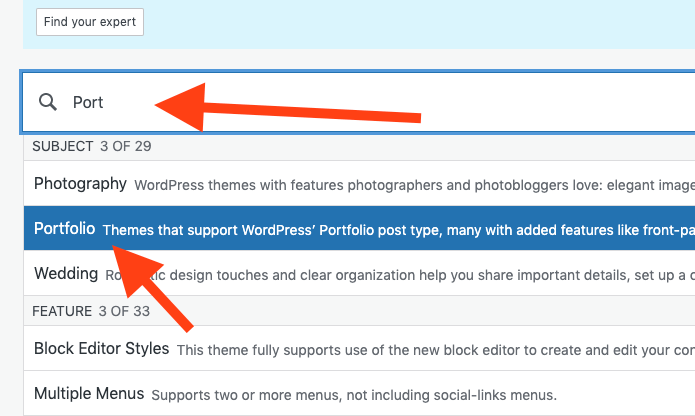
Once you get to the section entitled "Advanced themes", press the "free" button on the right to filter out paid themes.
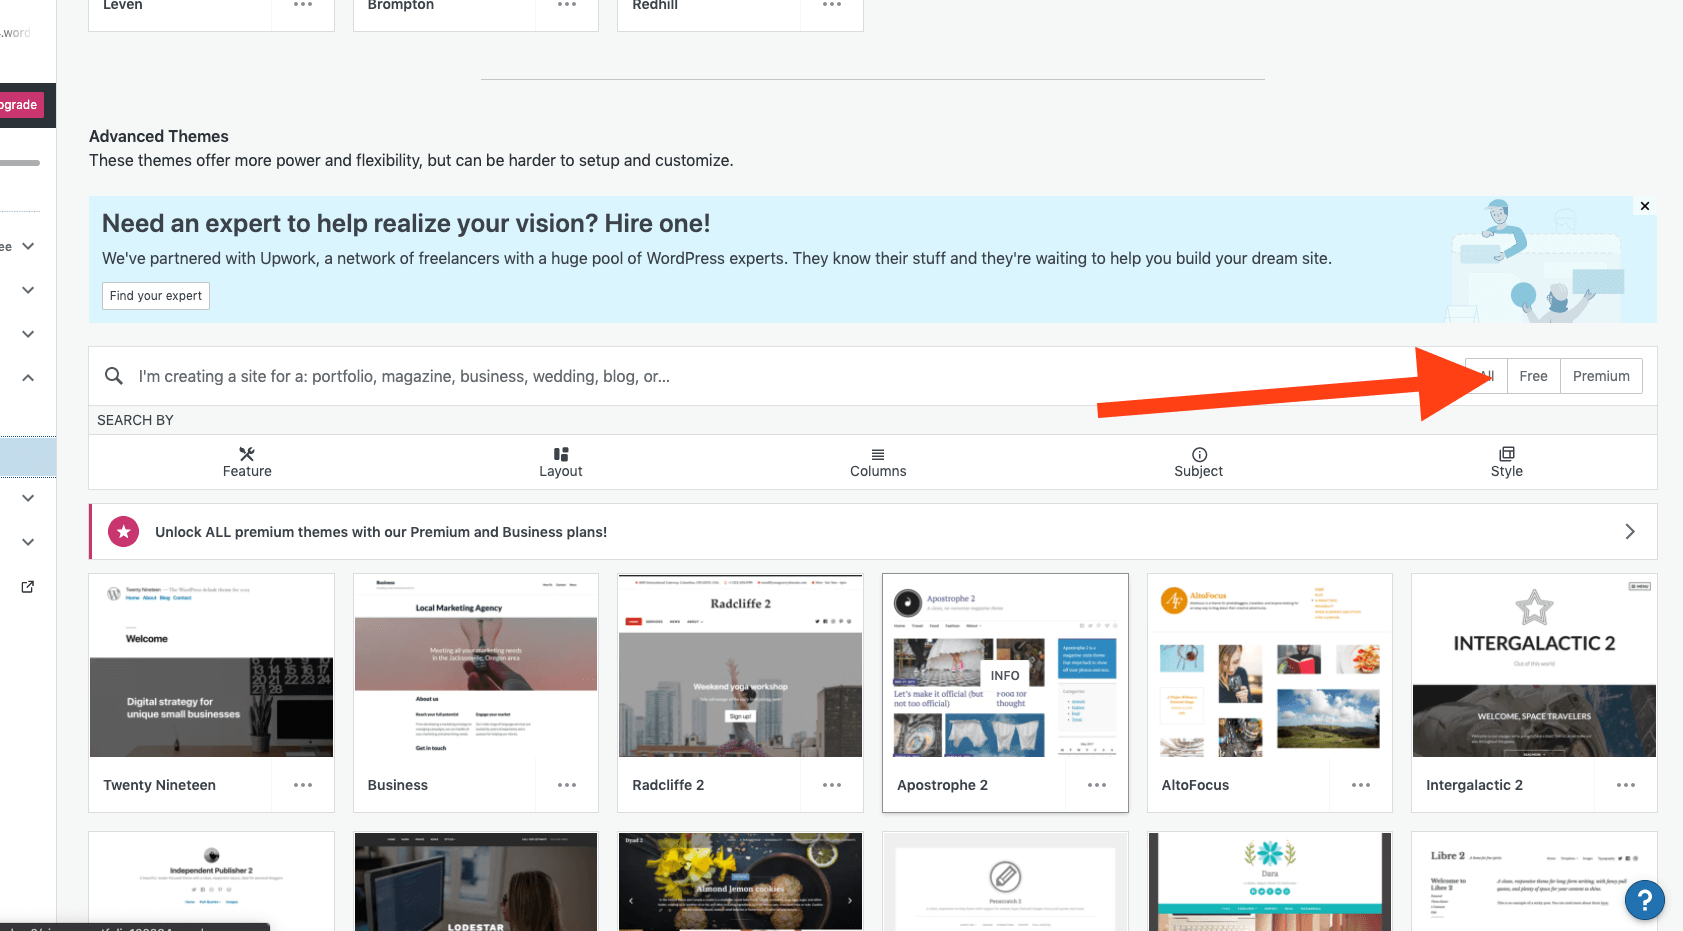
In the searchbar, search for "portfolio". You'll see an item that comes up, letting you search for themes that support the portolio post type.
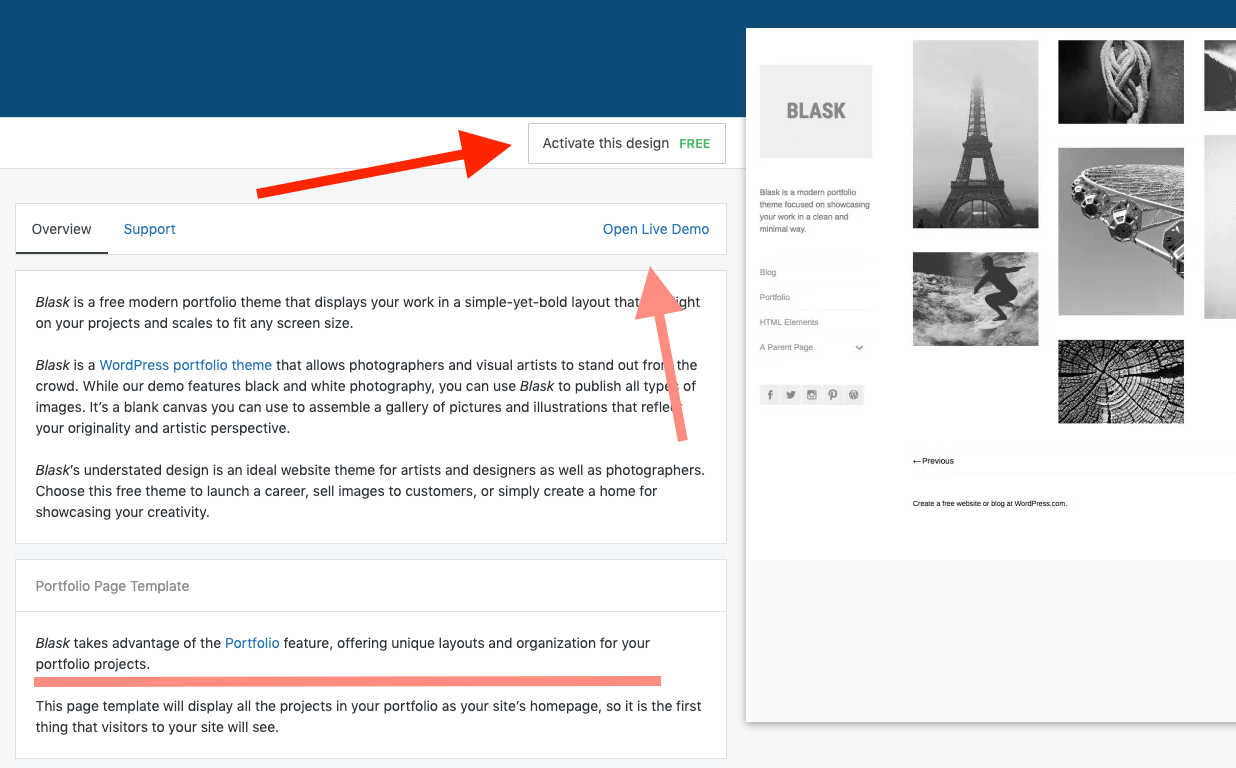
Choose a theme you like, and click on it. Check out the demo. If it looks like a good fit for your content, click "Activate".
After activating a new theme, you may find that your content doesn't "sit" the same way - adjust as necessary.

Customizing your theme
Last week, we only briefly touched on some of the ways to make a theme "customized". Head back to your dashboard and let's look at the options.
In the left-hand sidebar, choose "designAppearance".
Now click "Customize".
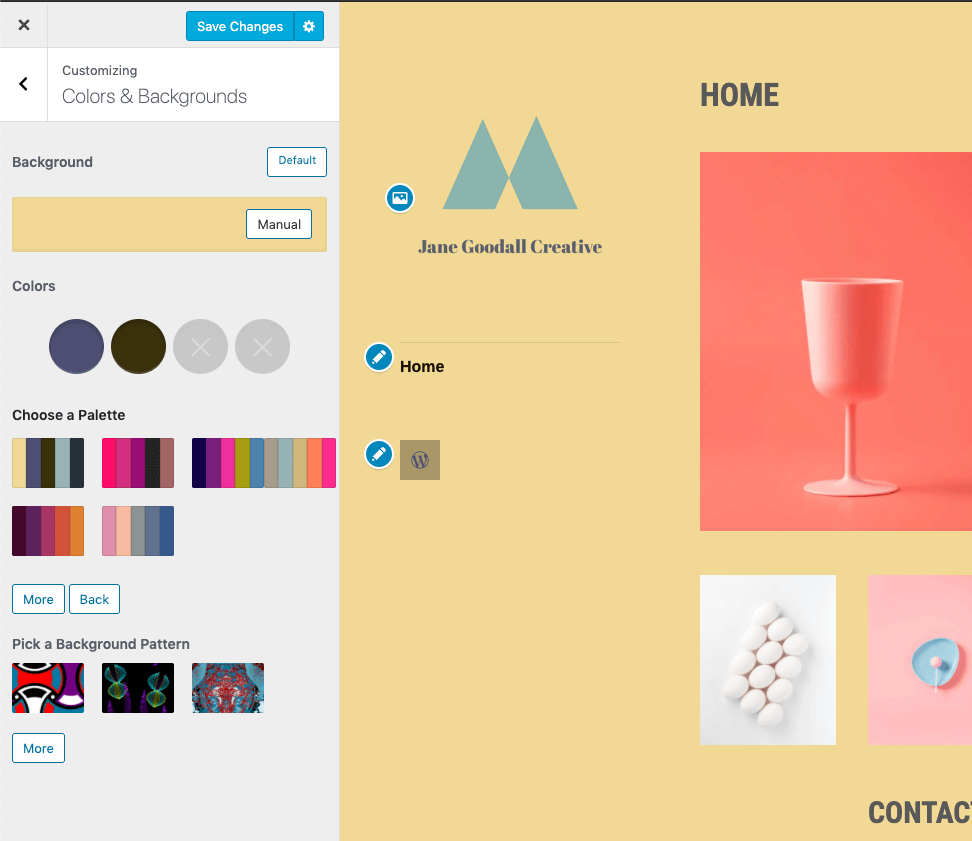
From the menu, if you choose "Colors & Backgrounds", you can choose a new colour palette for your site.
You'll see a lot of different options under "Customize". Today we'll focus on "Site Identity". Click on the "Site Identity" menu item.
If you don't have a site title set, or you want to change it, you can do that here! Likewise for your site's "tagline".

Creating portfolio posts
Now that we're done that big detour through brand assets, let's take advantage of our new post type and create some portfolio posts.
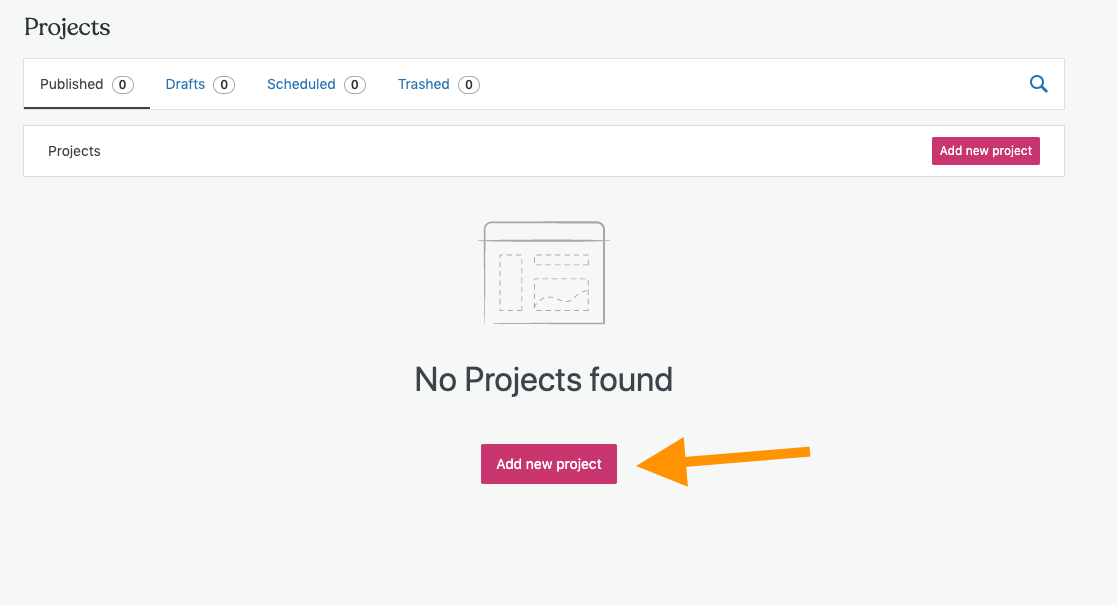
Head back to your Wordpress dashboard. In the left-hand menu, under "Site", choose "Portfolio".

Click "Add new project".
Looks pretty much the same as the blank page template. Give it a title, and start adding content!
Add some text, and then try adding a different kind of block by clicking on the "plus" button.
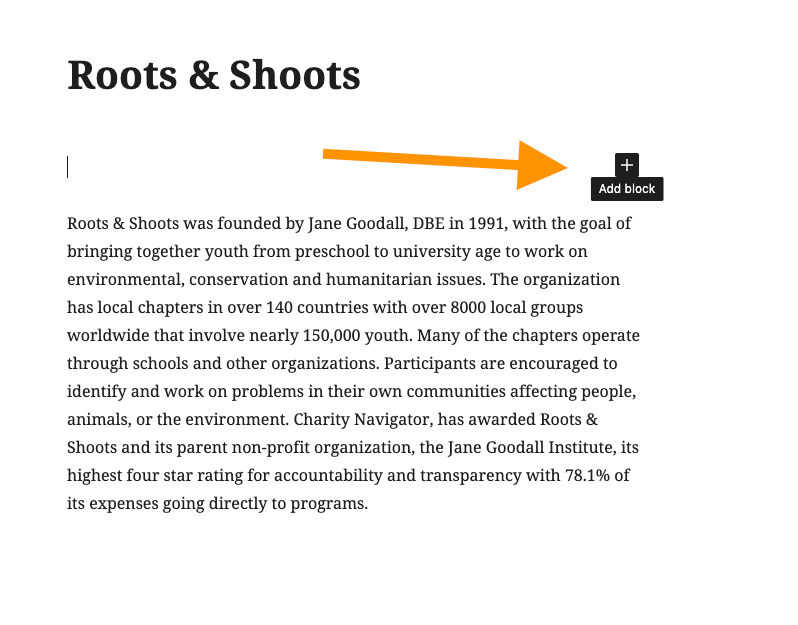
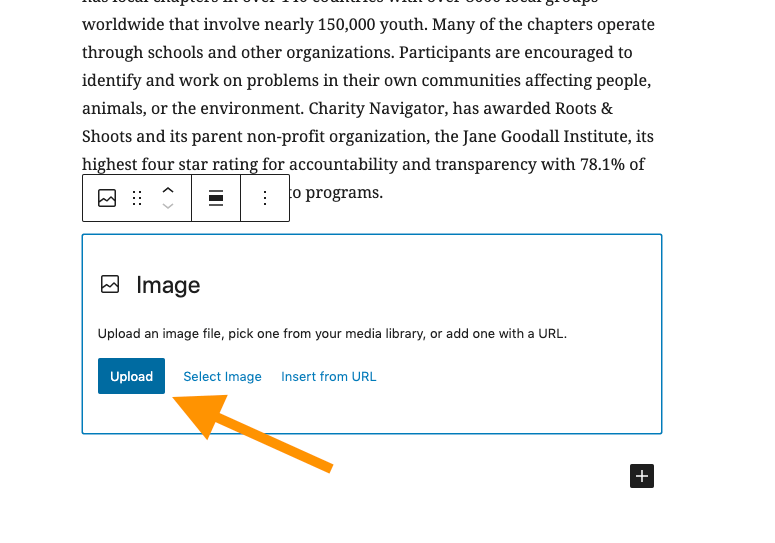
There's a ton of different types of blocks we can add! Let's keep it simple for now, and find the "image" block by clicking "browse all".
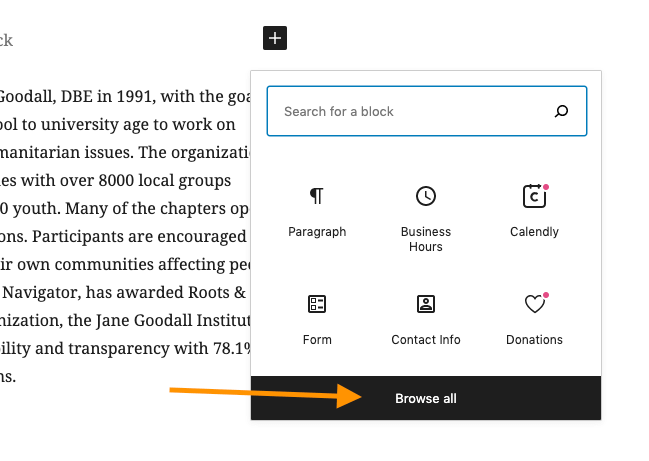
So many to choose from! Use the search bar to search for "image".
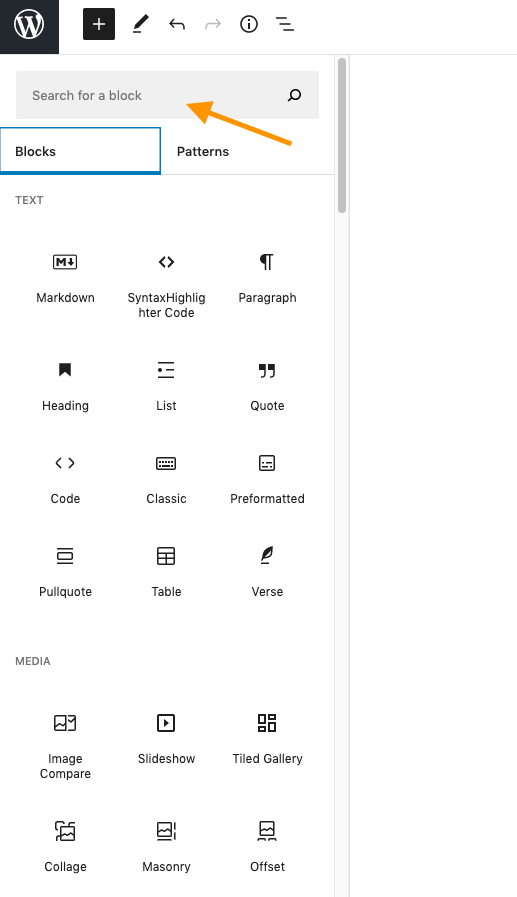
Now that your image block is in your portfolio post, upload an image to the block.
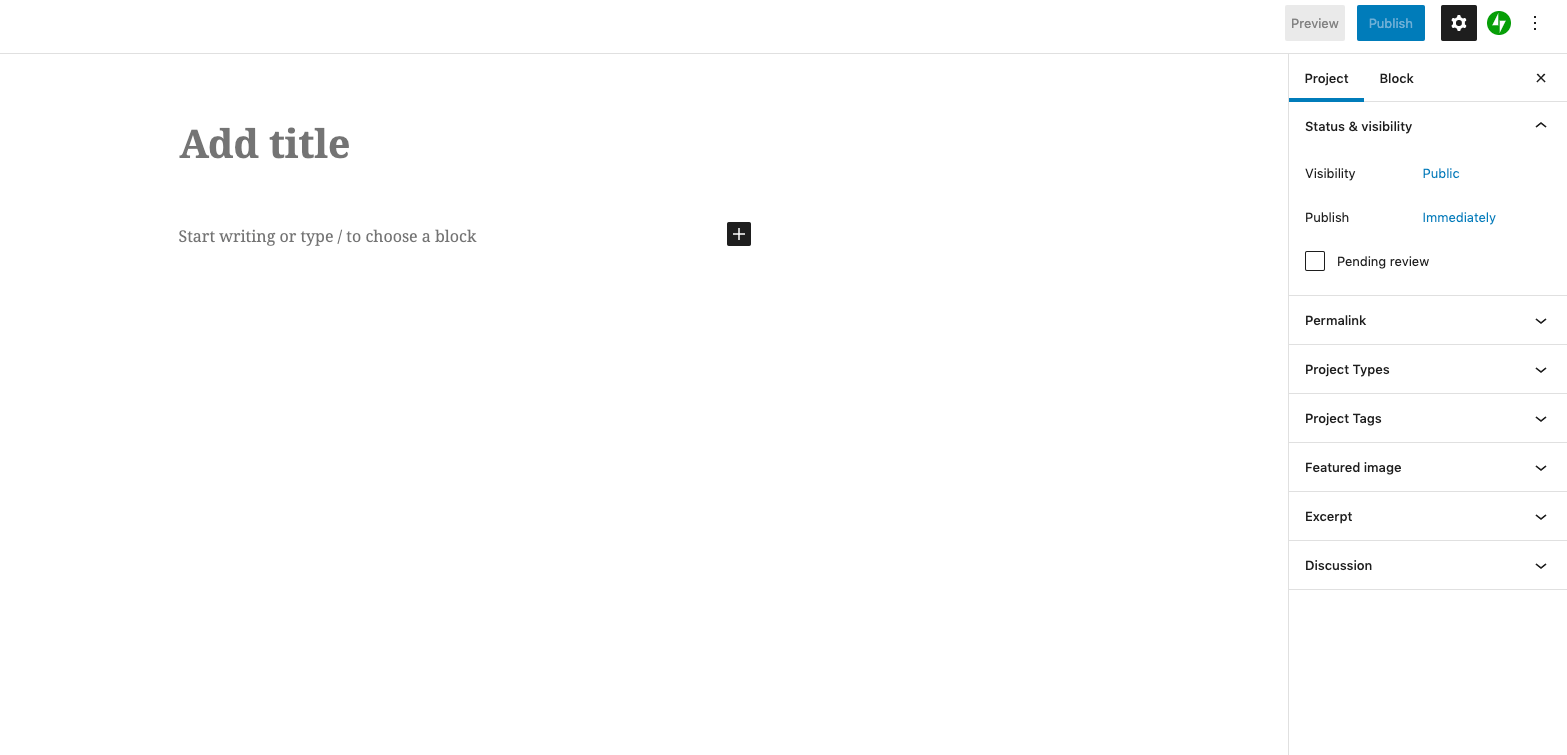
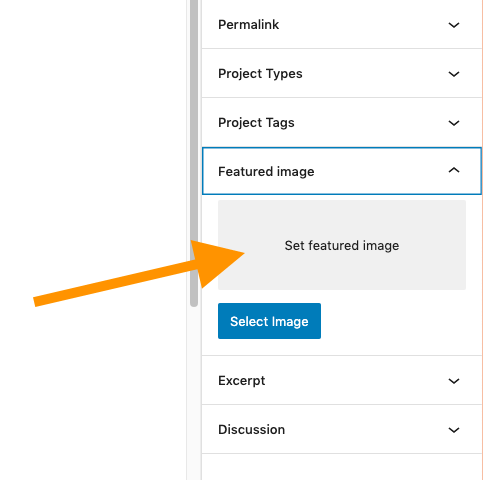
While you're at it, let's dig into the options in the right-hand menu, and upload a "featured image" for this portfolio post. That's the image that will show up on our Portfolio page to represent this post.
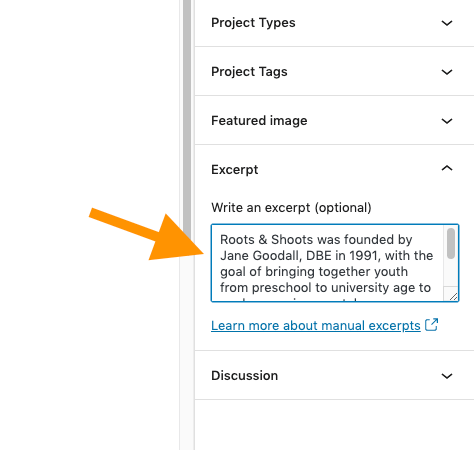
In the same right-hand menu, add an "excerpt", a small summary of the page. When in doubt, just grab the first sentence or two from the copy.
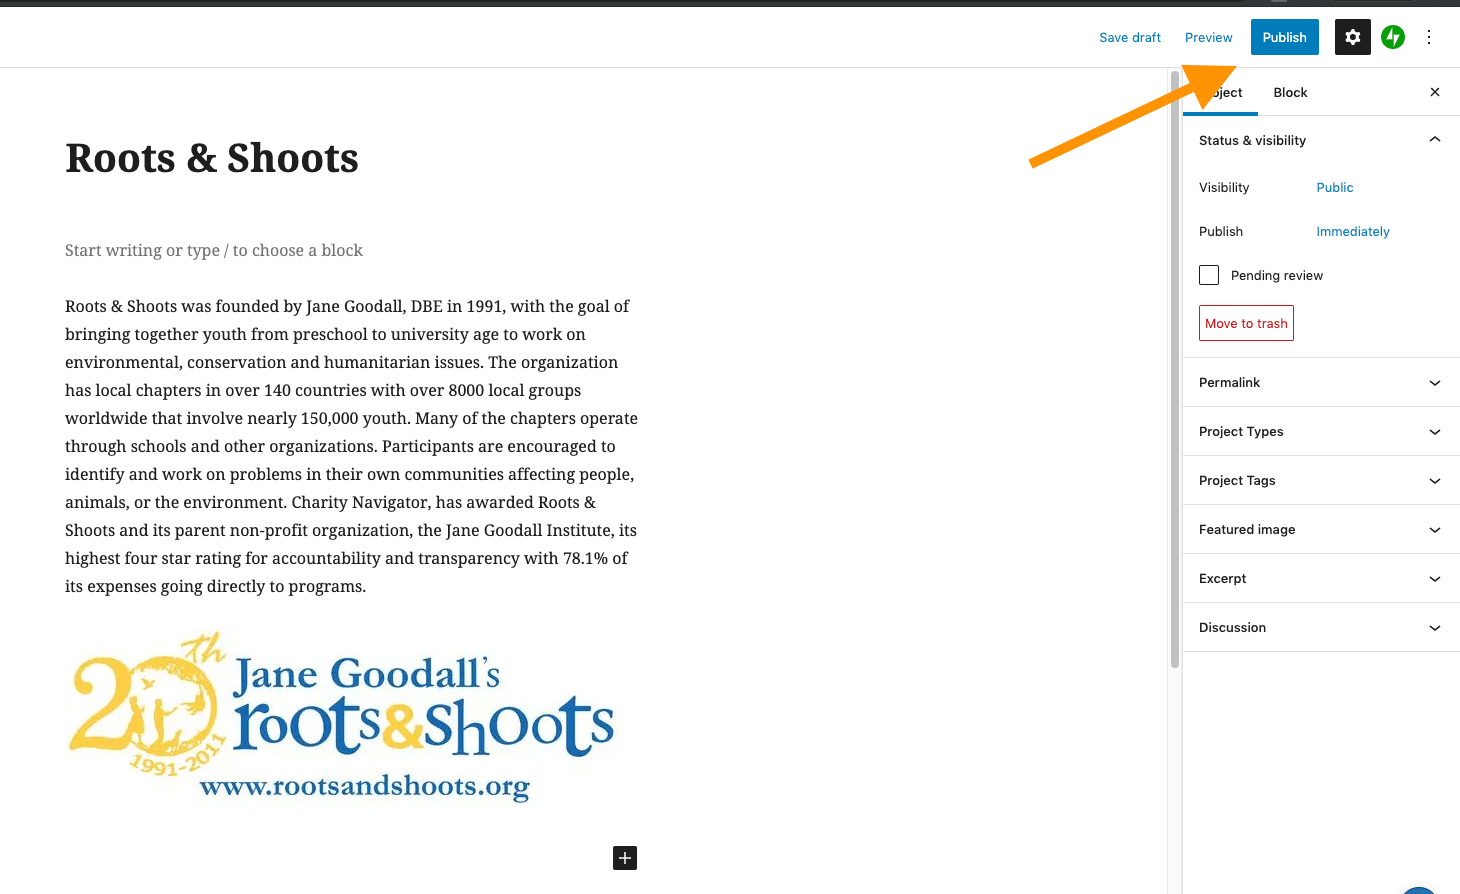
Once you feel good about your portfolio post, you head up to the top-right corner, and either preview your page, or just go ahead and publish it!
There's one more step before your portfolio posts will be accessible - you need to put your portfolio page in the menu. This is the same process we did last week for getting a page into the main menu.
Head back to your dashboard, and click on "My Home" to bring up the "Quick links" menu, or, in the left-hand menu, click on DesignAppearance > Customize. This will bring you to the customization screen, where you can choose "Menus".
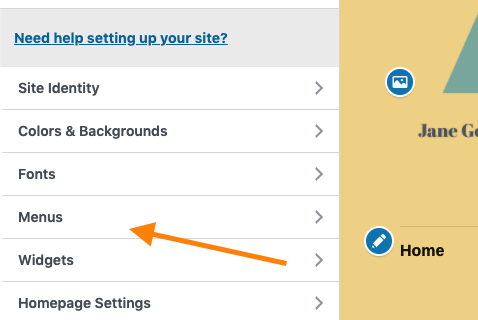
Edit your menu to include the "All Projects" page.
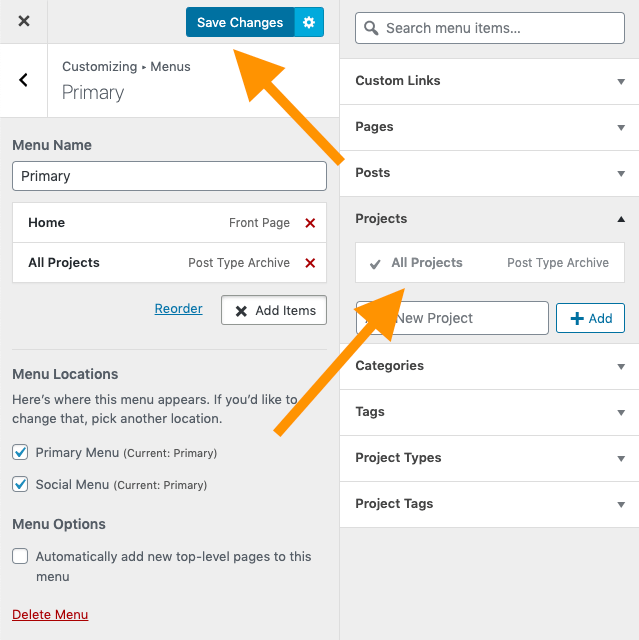
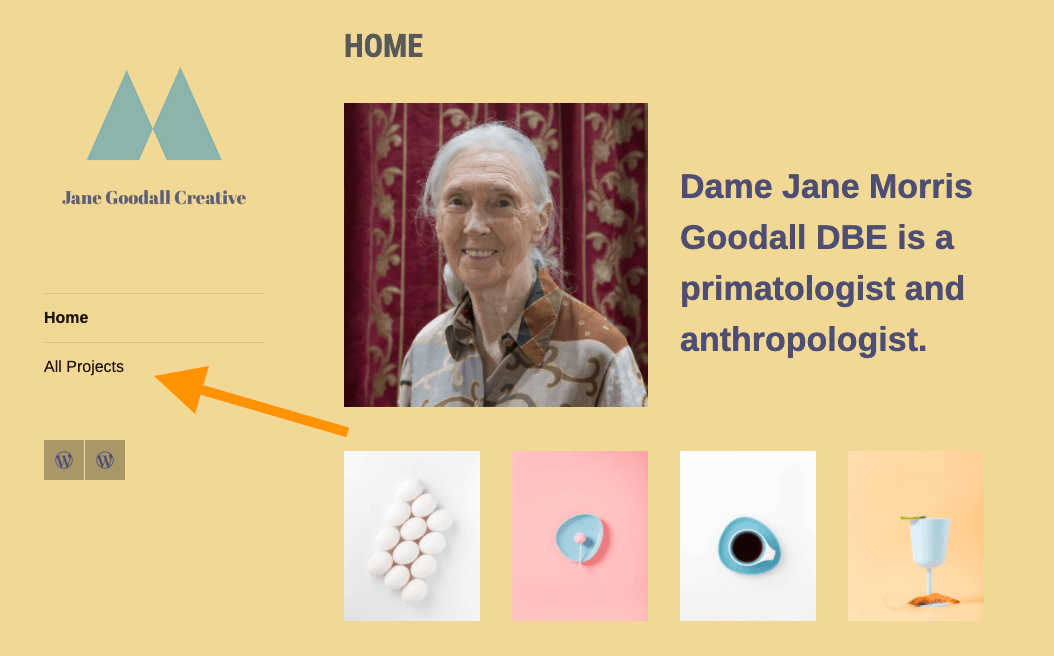
And just like that, your portfolio page, which will list all of your portfolio posts, is in your main menu!
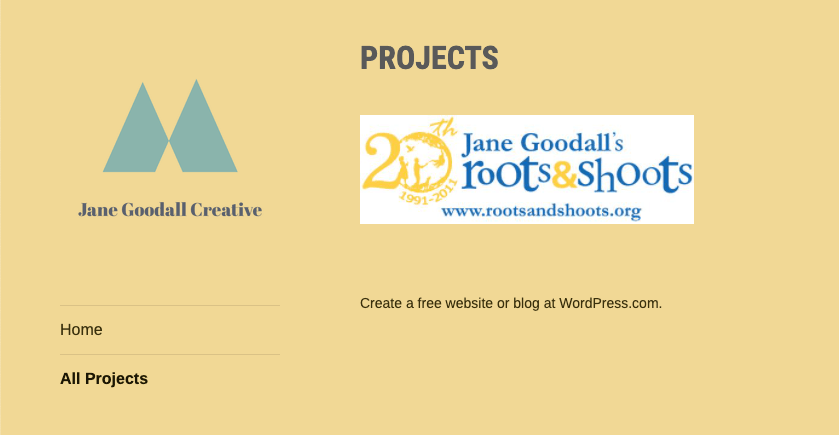
Your portfolio page, with featured images linked to your portfolio posts.

Alright, let's take a look at Assignment 2 and The Final Assignment

Brand assets
A "brand asset" is any media used exclusively for identifying a brand - this could include things like digital logos and banners, but also audio jingles or video titles.
Today we'll generate some brand assets!
There are a few ways that I might implicitly trust strangers on the internet who want to lend me their expertise:
- They are a part of a well-known, not-for-profit organization (i.e. MDN, W3C)
- They are a part of a well-known, for-profit organization, and I'm paying them a reasonable fee for what I'm getting (i.e. Flywheel, DigitalOcean)
- I know what they're selling, and I'm taking advantage of a free "reputation-building" service (i.e. Netlify)
The service I'm going to have us use today falls into that third category. Shopify Opens in a new window, for those of you who haven't heard of them, is a massive company that gives people tools for building online retail. They can afford to provide tools, like the one we'll be using today, pro bono as a form of advertising for their paid services.
Generating logos
Head over to hatchful.shopify.com Opens in a new window and let's generate some logos.
Fair warning: these logos are bland and generic. If you're a graphic designer, you'll probably want a logo that is, you know, good. And fair enough. However, using the Hatchful service is going to show us something very handy when it comes to generating brand assets, and the process only takes a few minutes, so bear with me.
Click on "Get Started".
Choose a "business space" and click next.
Choose a visual style that says what you want your "brand" to say.
Add your business/site name and slogan.
Select the contexts where your logo will get featured.
Choose from the dizzying array of options generated for you.
Once you choose a logo, you can update the name (and maybe the slogan, depending on your logo). Note the "fonts" and "colours" buttons on the left.
At this point, you can choose "colours" from the left-hand menu and update your logo colours. Be careful here - there are some really bad options, both palette-wise and for contrast.
After you click "next", you'll get taken to the download page. You may get prompted for an email address - feel free to use your own, or a temporary email, as we talked about last week.
You should be emailed a zip file with your brand assets within a few moments.
After you've downloaded the zip file, you can open it (just double-click the file, or right-click for different options). This will create a folder called HatchfulExport-All in the same place as the zip file.
Notice that there isn't one file in there, but a whole ton!
What are all these files? They're different variations of your logo optimized for different contexts.

Brand asset sizes
Remember a few moments ago when I said, "the Hatchful service is going to show us something very handy when it comes to generating brand assets"? This is it!
See, it's not enough to have one copy of your logo, especially when it comes to social media.
Hatchful generates a whole ton of different versions of your logo, with different sizes and aspect-ratios. These are to accommodate the optimal dimensions for different contexts on different platforms, from a pin on a Pinterest board, to a Twitter profile picture, to a linkedIn banner.
So, even if you're already designing your own logos in Figma, these assets we just generated are a very handy reference for the types and dimensions of the assets you'll need to generate.
Head back to Wordpress now, and we'll upload some brand assets!
Upload your logo! I'm going to recommend the file logo_transparent.png so that your background colours shine through, but you can also use logo.png if that works better for you.
Make sure you add your alt text! Click "Set as logo" when you're ready.
Next, go back to the "Site Identity" menu on the left, and, below where you set your logo, choose "Select Site Icon".
Upload a new file by choosing the "Upload files" tab, next to "Media Library".
Upload the file called favicon.png. A "favicon Opens in a new window" is the tiny logo that appears in the browser tab for your website.

Congratulations! Your site now has multiple brand assets in place!
Now, when you hear the phrase "internet comment section", you probably think, "hive of scum and villainy". You're not wrong.

You'll want to get acquainted with the Wordpress comment settings so that you can moderate incoming comments (or, much more likely, disable them entirely).
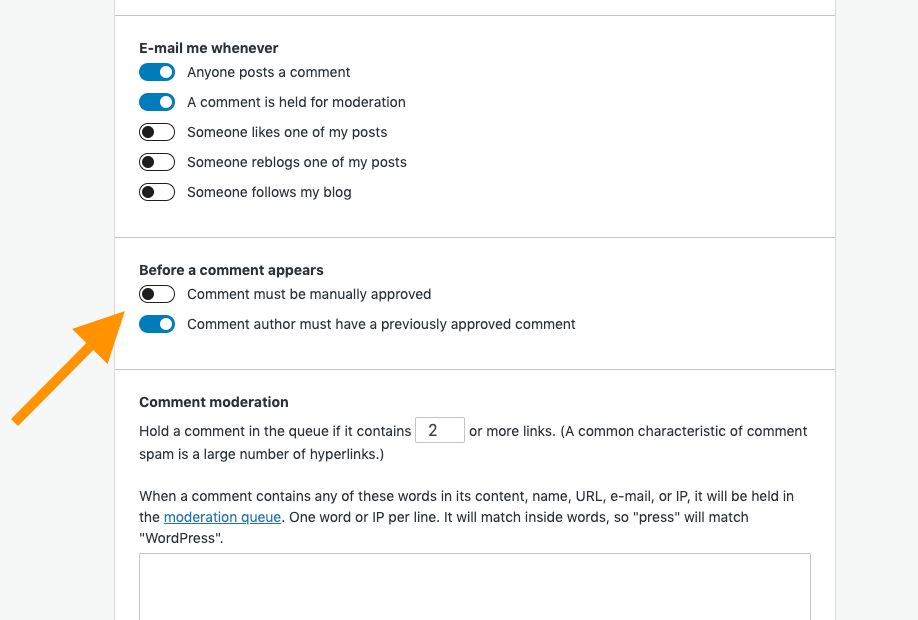
In the left-hand menu of your dashboard, go to Manage > Settings to go to the Settings page, then go to the "Discussion" tab.
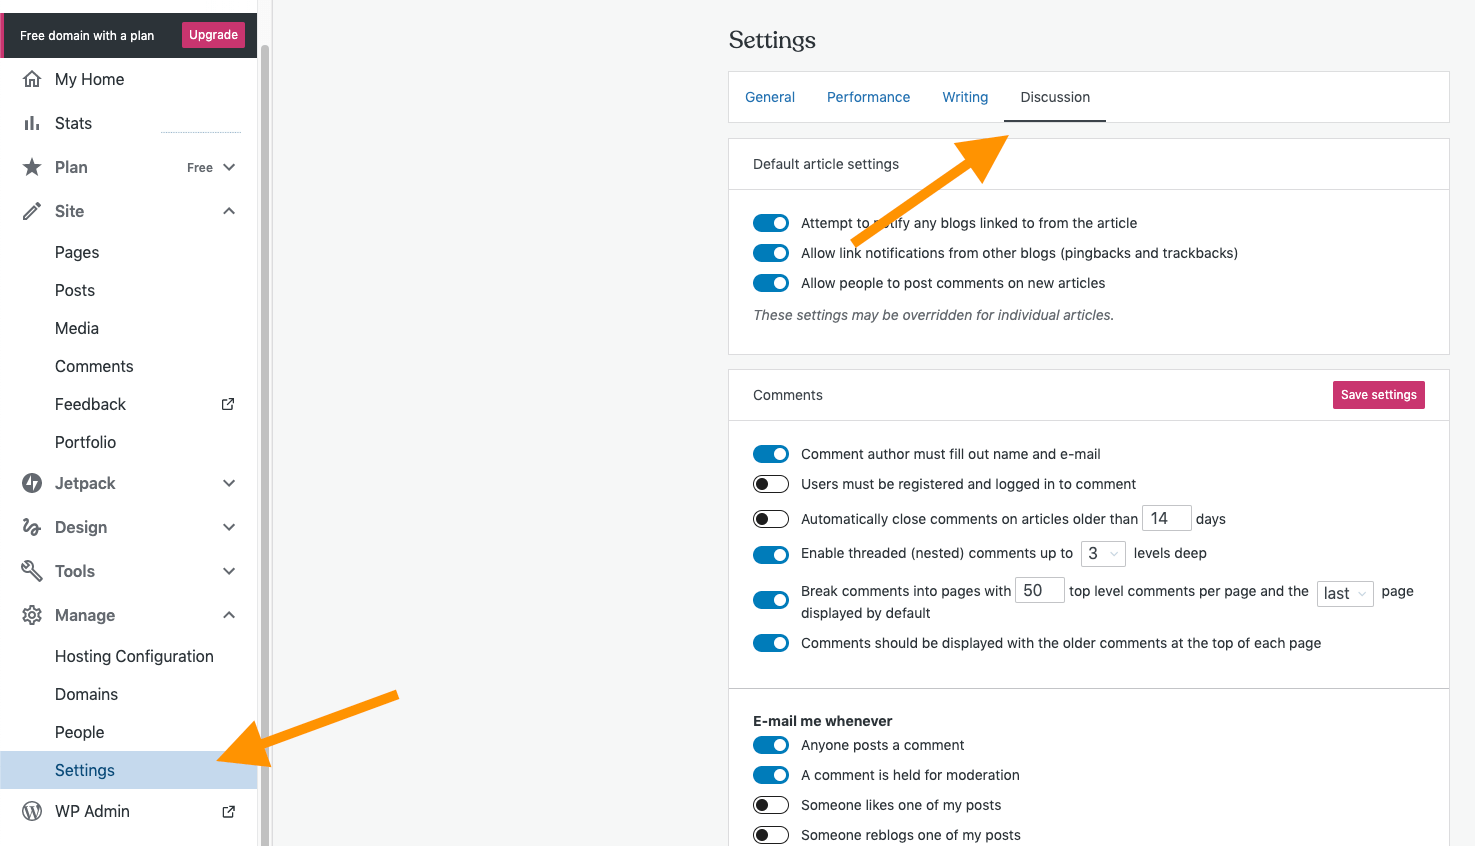
For the sake of experimentation, mess around with the comment settings all you like, but don't disable them entirely. The one toggle I'll direct you to set is Comment must be manually approved. Set this to the "on" position.

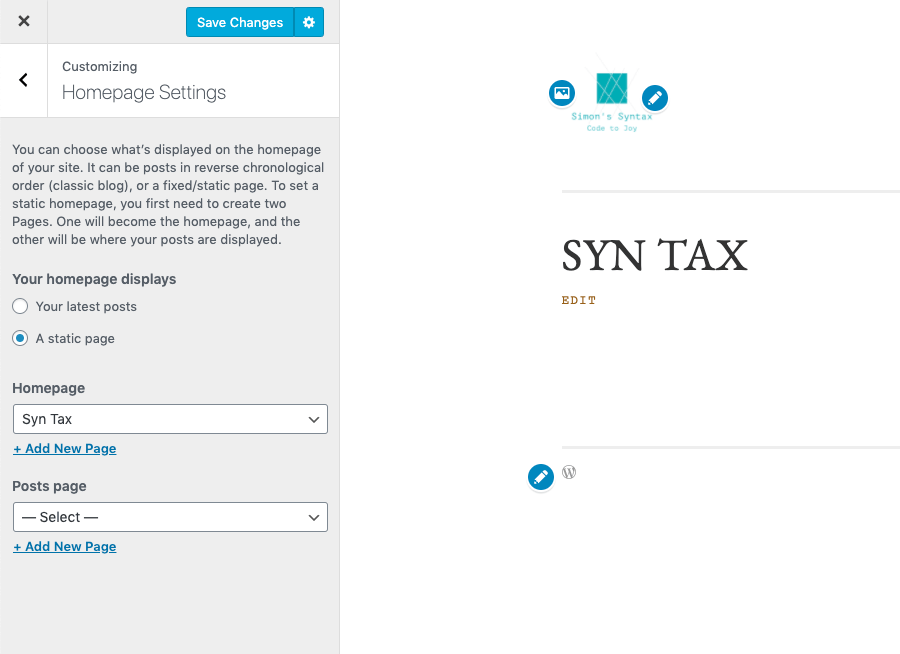
Creating a custom home page
The home pages provided to you by your theme are... fine. But let's give ourselves some credit and create our own home pages.
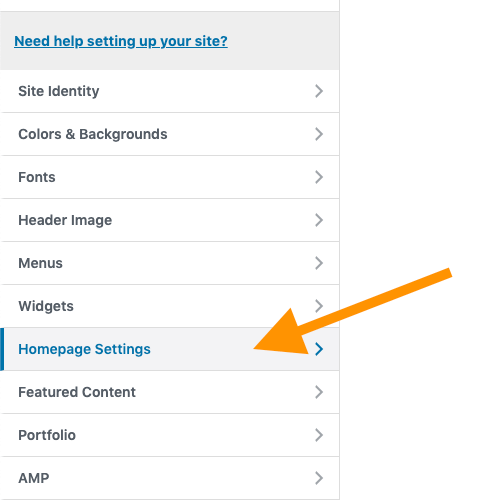
Head to your dashboard, click "Customize".

On the "Customize" page, click "Homepage Settings".
If your theme's default is "Your latest posts", switch it to "A static page". Regardless, the next step is to click "Add a new page" under the dropdown with the "Homepage" title.
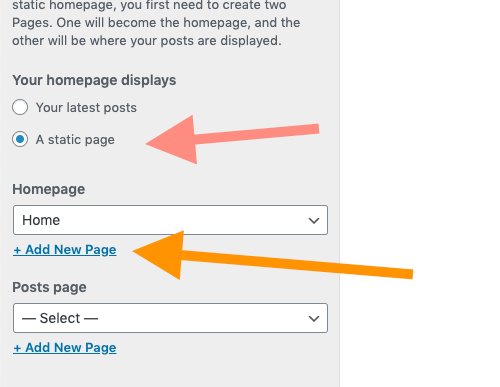
Create a new page using the "Add a new page" button. Doesn't need to be anything fancy yet, we'll mess around with it shortly.
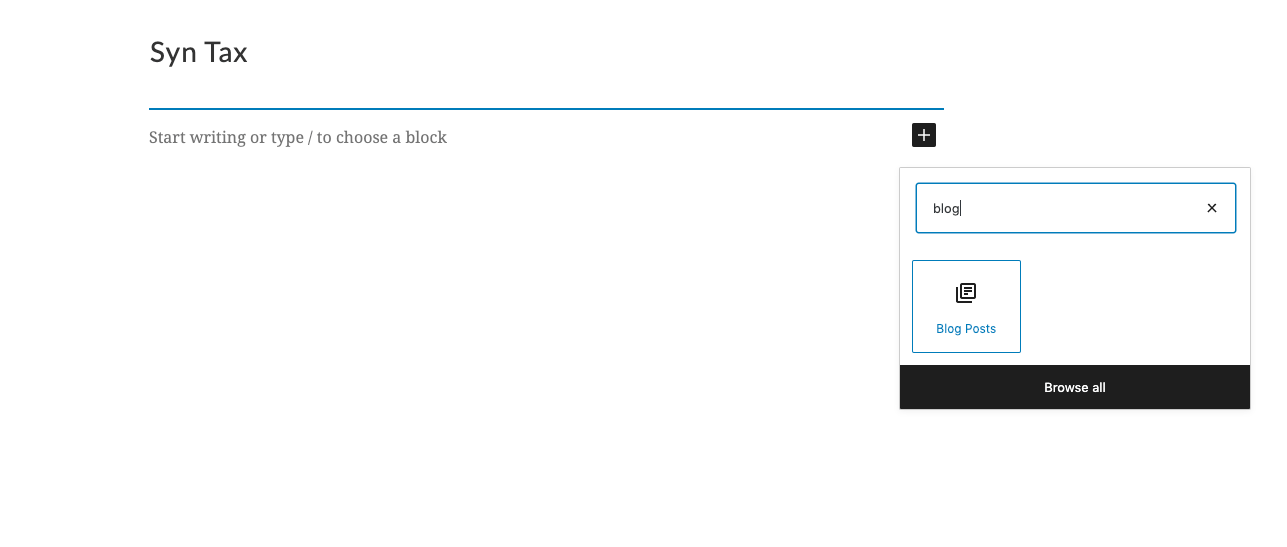
Now we can get to work making it cool. Let's see how to add custom-filtered posts automatically to the home page.
The first step is to add the "Blog Posts" block.
At this point, we've got some powerful configuration options, including choosing specific posts to display, specifying the number of posts to show, and filtering posts by author.
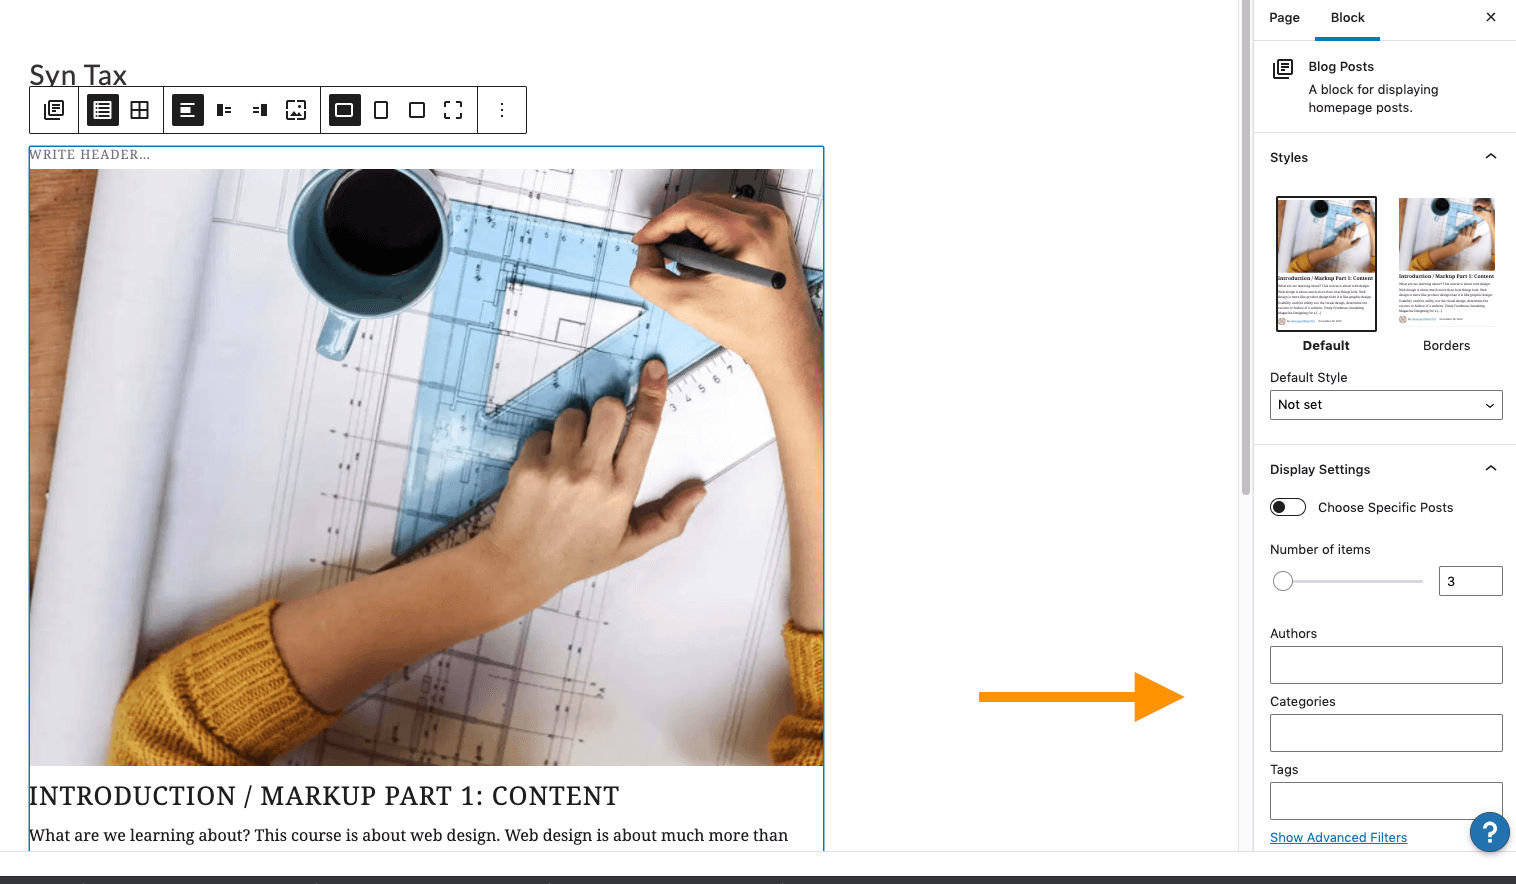
You've also got the option to select specific categories and tags to display on the front page.
But what does that even mean? What are categories and tags, how does Wordpress use them, and what the heck is the difference?

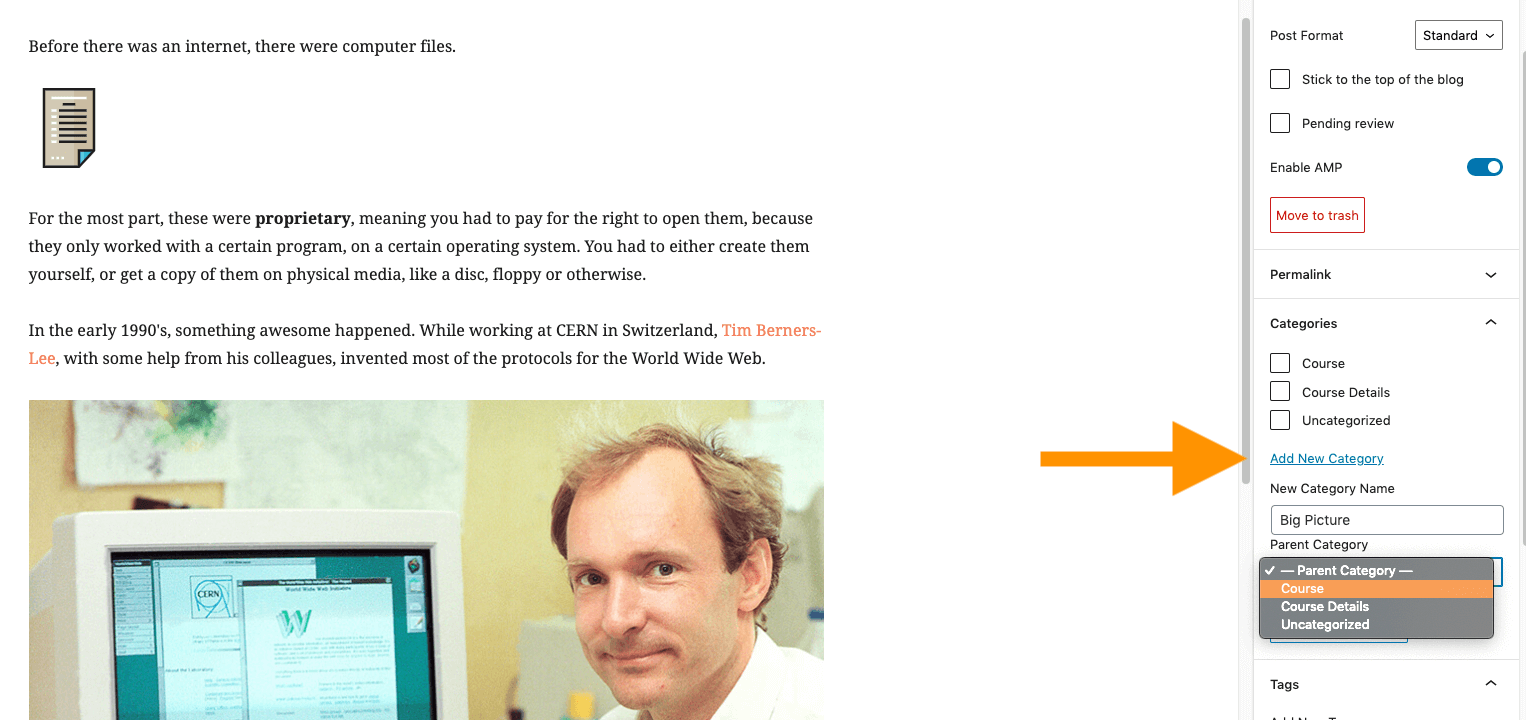
Categories and Tags
What's the difference?
As you might have guessed, both categories and tags are ways to classify posts. While they share a lot of the same functions, they should be treated as tools coming from opposing angles for the purpose of classification. Categories are the giant cleaver, and tags are the tiny, precise scalpel.
Categories are broad subjects - every post should fall into a category, but if you're putting posts into more than, say, two categories, your categories will lose meaning. The purpose of categories are to divide your posts up into a few groups.
Your categories should be defined so that all the content of a post falls into that category. If your posts were pages in a book, the category would be the chapter title.
Your users should be able to head to a category to discover content.
Tags are for very specific classifications of content. Go ahead, put tons of tags on your posts.
Your tags should capture any subjects that are covered anywhere within a post. The purpose of tags are to supplement site search, so that, even if it's not apparent from the title or summary of a page, users know if a subject is mentioned in the post.
If your posts were pages in a book, the tags would be the index at the back of the book that lets your users find buried content.
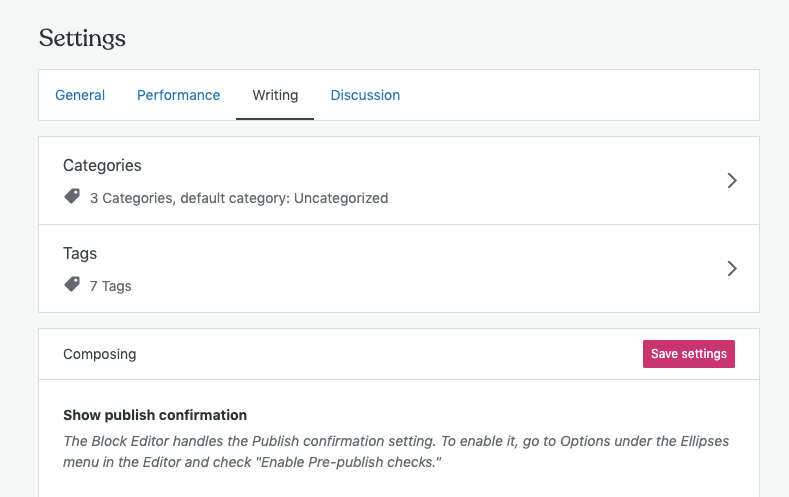
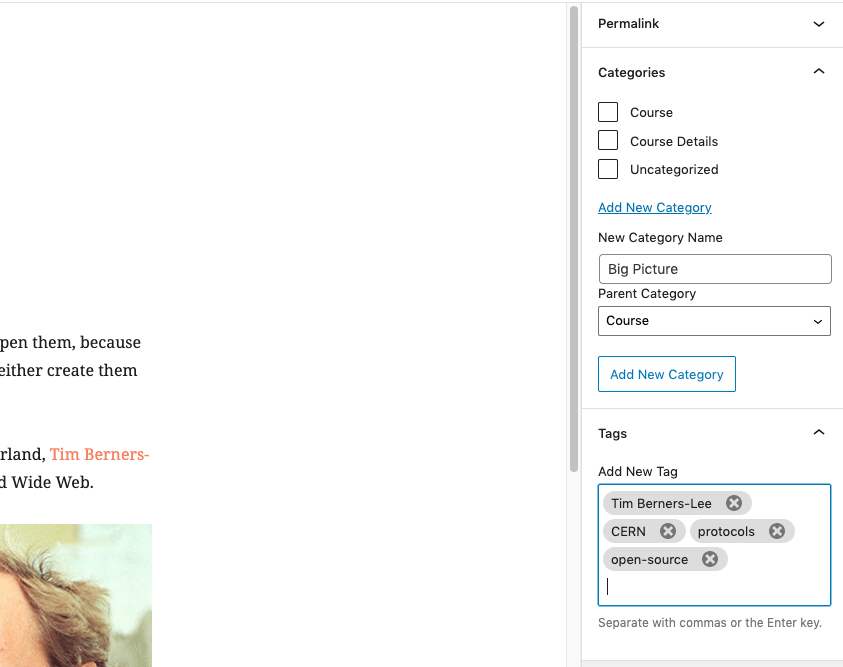
You can create and manage them by going to Manage > Settings > Writing, where you can do things like set a default category for posts, delete tags, or see all posts belonging to that classification.
However, the way you'll mostly end up interacting with both tags and categories is through the options while you're creating a post.
You can also add all the tags you want, either by typing the tag name and hitting enter to create a new tag, or by typing until you see an existing tag get suggested.
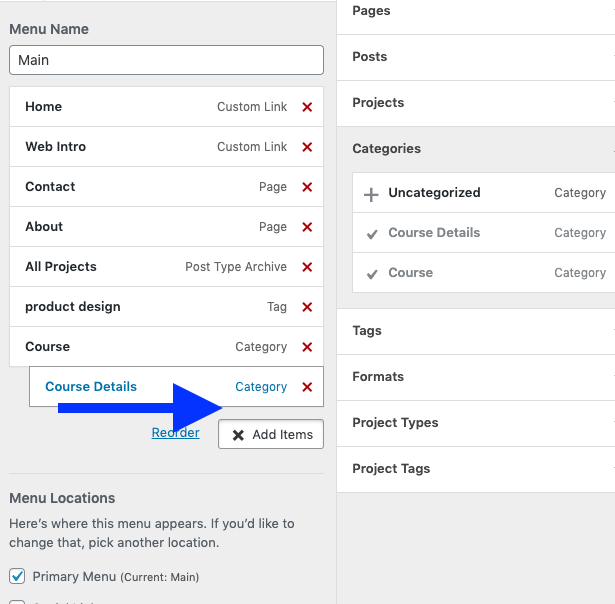
One cool thing about categories and tags is that they automatically generate pages that list all the posts with the same tag or within the same category.
Let's take advantage of that by learning how to add them (and any other link!) to our menu.

Add any link to your menu
Now, you already know how to add pages to your menu. From your dashboard, go to DesignAppearance, and on your customization page, click on "Menus", and choose the menu you want to edit (probably "Primary").
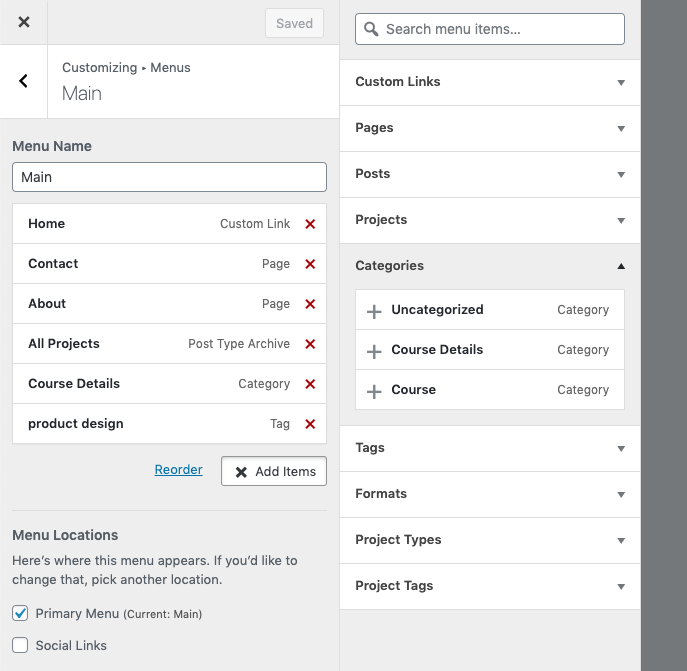
Click on "Categories" or "Tags" to see a list of your categories and tags. If you add one of them to the menu, it will add a link to a page that lists all posts within that category or tag.
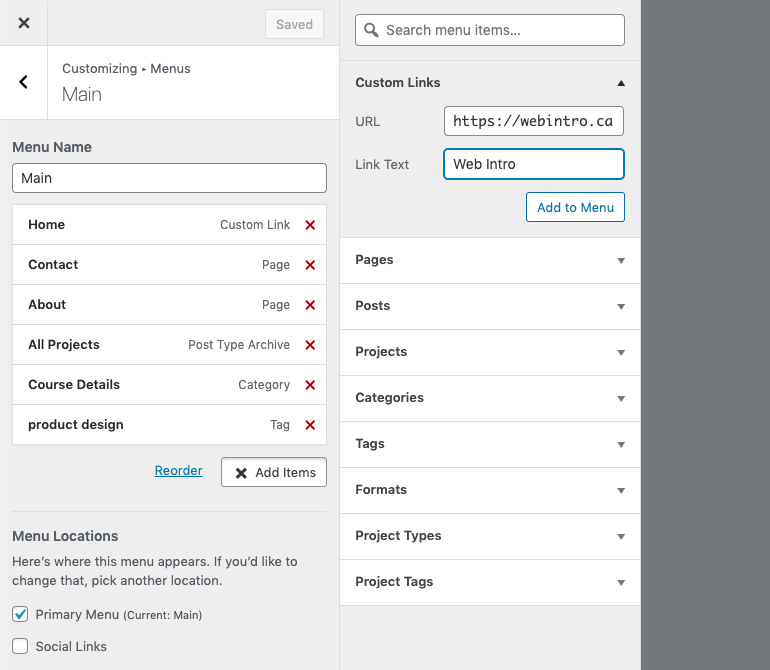
Adding a custom link
Want to add a custom link to the menu? Just click on "Custom Links".
Adding sub-menu items
Want to see additional links when you hover over a menu item?
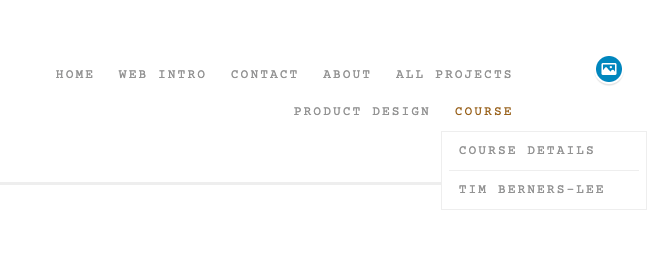
Just drag menu items to the right to make them "sub-menu" items.
Comment settings
One more thing I want us to look at today: comments.